Creating a Custom Markup Language
I created this site as a way to make publicly available write-ups about my various coding/miscellaneous projects. Unfortunately, writing code is difficult and time consuming, so I would rather not edit a new HTML file every time I want to make a new post. A custom markup language would help streamline my workflow and make it easier to put out posts without as much of a hassle.
1.1 Overview
This site is set up as a very basic express.js app, with a frontend of HTML and CSS. Every post follows a relatively similar architecture, with a button to return to the homepage and a title followed by several subsections with multiple paragraphs each. Embedded code is handled using prism.js (Website), which I installed locally and placed in the /public folder of my site directory alongside the site's CSS stylesheets.
You can find an example of this basic architecture below.
<!DOCTYPE html>
<html>

<head>
  <title>Post Title</title>
  <meta charset="utf-8">
  <link rel="stylesheet" href="/styles.css">
  <link href="prism/prism.css" rel="stylesheet" />
</head>

<body>
  <article>
    <a href="/home" class="home-button">
      <img src="img/back-arrow.svg" style="width:30px;height:30px;"></img></a>

    <h1>Title</h1>

    <h2>1.1 Subheading</h2>
    <p>This is some sample text </p>
    <p>This is some sample inline code <code class='language-python'>print("Hi")</code></p>

    <h2>1.2 Subheading</h2>
    <p>This is some sample text </p>

  </article>
  <footer><p>Made by Rally Lin</p></footer>
  <script src="prism/prism.js"></script>
</body>

</html>
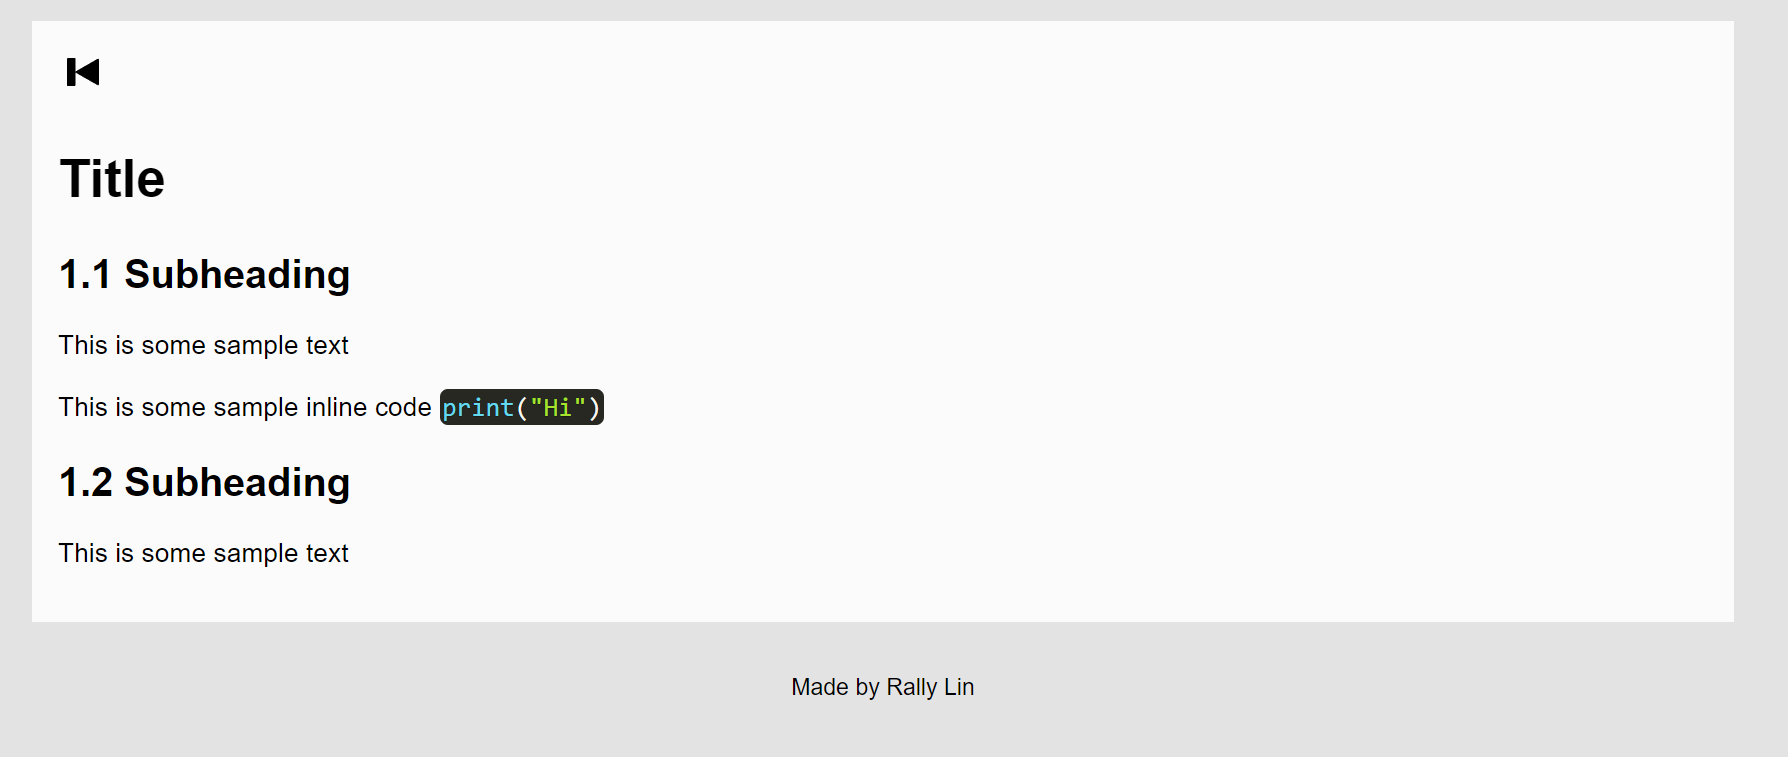
In order to determine the key elements for our custom markup language, we should simplify the code into its core functions. This allows us to create a simple set of definitions for each function for our new markup.
We want our code to be able to define titles and subtitles.
As well as bolded and italicized text.
We wish to support both inline code a = 5 and block code.
a = 5
b = 10
print(a+b)
Lastly, we want support images.
Next, let's define a set of prefixes/keys which correspond to each of our functions. I wrote this out in a text file for clarity's sake.
#title						<h1>title</h1>
##header					<h2>header</h2>
regular text				<p>regular text</p>
**bold**					<strong>bold</strong>
__italics__					<em>italics</em>
`[lang]inline code`			<code class='language-lang'>inline code</code></p>

```[lang]					<pre><code class='language-lang'>multiple
multiple						line
line							code
code						</code></pre>
```

[img]/image_src				<div class = 'image-container'>
								<img src = 'image_src' style='width:75%;height:75%;'></img>
							</div>
Now our interpreter just needs to translate our own custom syntax to the HTML equivalents outlined above.
1.2 Coding the interpreter
I chose to write my interpreter in Python, as it is the language with which I am the most familiar with regular expressions in, although I'm sure such a project could work equally well in any other language.
I start by taking in an input file and looping through every line. Our program should check and apply any
commands on each line, but for now, it reads every line in the text file and strips trailing zeros and the newline
character from it. We store our output (which we will eventually write to an output file) in a string out.
import re #regex library which we will use later

f = open("input.txt", "r")

out = ""
for line in f:
	line = line.rstrip()
Let's handle the simplest commands first. The # and ## prefix denotes a block of text as a title and subtitle, respectively. The Python
function .startswith() allows us to check for line prefixes within our set of
commands. If it is one of the aforementioned commands, we can add the tags and append to the output file
accordingly. The order of the if statements matters here; if we check for the #
command first, it will execute (and therefore skip the second condition) even when the prefix is "##" because "#"
is a prefix of "##".
...
out = ""
for line in f:
	line = line.rstrip()
	if(line.startswith("##")):
        out+=f"<h2>{line[2:]}</h2>\n\n"
    elif(line.startswith("#")):
        out+=f"<h1>{line[1:]}</h1>\n\n"
The [i] prefix works in a pretty similar way to the title/subtitle command, but
it appends multiple lines of HTML, using string interpolation to insert our image source path into the tags.
...
out = ""
for line in f:
	line = line.rstrip()
	if(line.startswith("##")):
        out+=f"<h2>{line[2:]}</h2>\n\n"
    elif(line.startswith("#")):
        out+=f"<h1>{line[1:]}</h1>\n\n"
	elif(line.startswith("[i]")):
      src = line[3:]
      out+=f"<div class = 'image-container'>\n\t<img src = '{src}' style='width:75%;height:75%;'></img>\n</div>\n\n"
Next, we can implement block code. Unlike the previous commands, block code formatting can extend over multiple
lines. My crude solution was to create a boolean variable which stores whether the current line is part of block
code. We set it to True every time we see a ```[lang] prefix, and
False when we encounter a ``` suffix. If a line is currently part of
a code block, we know not to apply our formatting commands to it and to sanitize the line (replacing < with
<) to avoid issues with our end HTML code. Obviously this is a crude solution, and it doesn't work with
nested delimiters. As a result, whenever I need to reference a backtick elsewhere, I use the HTML character
entity (`) instead.
...
def clean_code(s):
  return s.replace("<", "<")

code_block = False
out = ""
for line in f:
	line = line.rstrip()
	if(line.endswith("```")):
        line = clean_code(line[:-3])
        out+=f"{line}</code></pre>\n\n"
        code_block = False
    elif(code_block):
        line = clean_code(line)
        out+=f"{line}\n"
	elif(line.startswith("```[")):
        lang = re.search(r"(?<=\[).+?(?=\])", line).group() #Use a regular expression search for the first within [] to find the language
        out+=f"<pre><code class='language-{lang}'>"
        code_block = True
	elif(line.startswith("##")):
        out+=f"<h2>{line[2:]}</h2>\n\n"
    ...
Lastly, let's add the automatic paragraph function. Whenever we type text without commands, we want it to be
wrapped within paragraph tags. We also want this text to be formatted if it contains any ** bold, __ italics, or inline code so we pass
our line through a formatting function before appending it to the output file.
...
def inline_formatting(s):
    s = inline_bold(s)
    s = inline_italics(s)
    s = inline_code(s)
    return s

out = ""
for line in f:
	line = line.rstrip()
	...
	elif(line!=""):
      out+=f"<p>{inline_formatting(line)}</p>\n\n"
We can start by writing the function which substitutes bold delimiters. We can use a regular expression which matches to text in between double asterisks and appends the bold tags to either side. The same technique also works for italics, just with a different delimiter. Formatting inline code is a bit more complicated (we first have to search for the language enclosed in square brackets before the substitution), but it follows a similar process.
def inline_bold(s):
	return re.sub(r"(?=\*\*).+?(\*\*)", lambda match: f"<strong>{match.group()[2:-2]}</strong>",s) #re.sub works with a string replacement, but it can also take in a function, which we define with lambda here
def inline_italics(s):
	return re.sub(r"(?=__).+?(__)", lambda match: f"<em>{match.group()[2:-2]}</em>",s)
Formatting inline code is a bit more difficult. In addition to substituting the tags, we also need to read
the specified language string and pass it into the code element's class. Instead of substituting all matches
at the same time, we need to handle each substitution separately (as they may have different languages). We
can initialize a find variable, which stores the index of the next
backtick character. As long as there are still backticks within our string, we continue to read the language
strings and make substitutions, updating the string each iteration with a new value until all backticks have
been replaced (and thus all inline segments have been handled).
def inline_code(s):
    find = s.find("`")
    while(find!=-1):
      lang = re.search(r"(?<=\[).+?(?=\])", s[find:]).group()
      s = s[:find]+re.sub(r"(?=`).+?(`)", lambda match: f"<code class='language-{lang}'>{match.group()[3+len(lang):-1]}</code>", s[find:], 1) #substitutes only the first match in our substring
      find = s.find("`")
    return s
All done with inline formatting! Before we set our script up for the command line, we should remember to
append a prefix and suffix string to the beginning and end of our output file with all of the tags necessary
for our HTML file to function. When adding our prefix, we can implement the @ command as well, which is located at the top of the file and defines the HTML title
(shown on the browser tab).
...
pre = '''<!DOCTYPE html>
<html>
  <head>
    <title>%s</title>
    <meta charset="utf-8">
    <link rel="stylesheet" href="/styles.css">
    <link href="prism/prism.css" rel="stylesheet" />
  </head>
<body>
<article>
  <a href="/home" class="home-button">
    <img src = "img/back-arrow.svg" style="width:30px;height:30px;"></img></a>

'''

suf = '''</article>
<footer><p>Made by Rally Lin</p></footer>
<script src="prism/prism.js"></script>
</body>
</html>
'''

code_block = False
out = ""
for line in f:
	line = line.rstrip()
	if(line.endswith("```")):
        line = clean_code(line[:-3])
        out+=f"{line}</code></pre>\n\n"
        code_block = False
	...
	elif(line.startswith("@")):
      out= pre % (line[1:])
	...

f = open("output.txt", "w")
f.write(out)
f.close()
Currently, our code is always reading from input.txt and output.txt. For more convenient usage, I added the ability to pass in file paths for the input and output when running the program in the command line.
import re
import sys

if len(sys.argv) != 3:
    print("Invalid argument:\nUse >> python interpreter.py [infile.txt] [outfile.html]")
    sys.exit()
path_in = sys.argv[1]
path_out =  sys.argv[2]
The interpreter is finished! See the project files for the full code. Let's try and test our interpreter script with the input markup text file shown below.
@Title

#Title

##1.1 Subheading

This is some **sample** text
This is some __sample__ inline code `[python]print("Hi")`

```[java]
System.out.println("Testing")
```

##1.2 Subheading
This is some sample text

When we route our app to the .ejs file produced, we should get the correct display! You might want to use the autoformat option in your text editor (in my case Visual Studio Code) to reformat the output code to make the resulting HTML file more readable.
1.3 Custom syntax highlighting
As of right now, we already have full functionality with our text interpreter. If we wanted to, we could hop into a text editor and start writing our markup with no problems. To make our lives a bit easier, however, we can implement some custom syntax highlighting to make our markup easier to work with. We can achieve this with user defined languages (UDLs) in the Notepad++ text editor (Download). Within the Notepad++ UDL editor, we can define a new custom language and set the default text formatting.
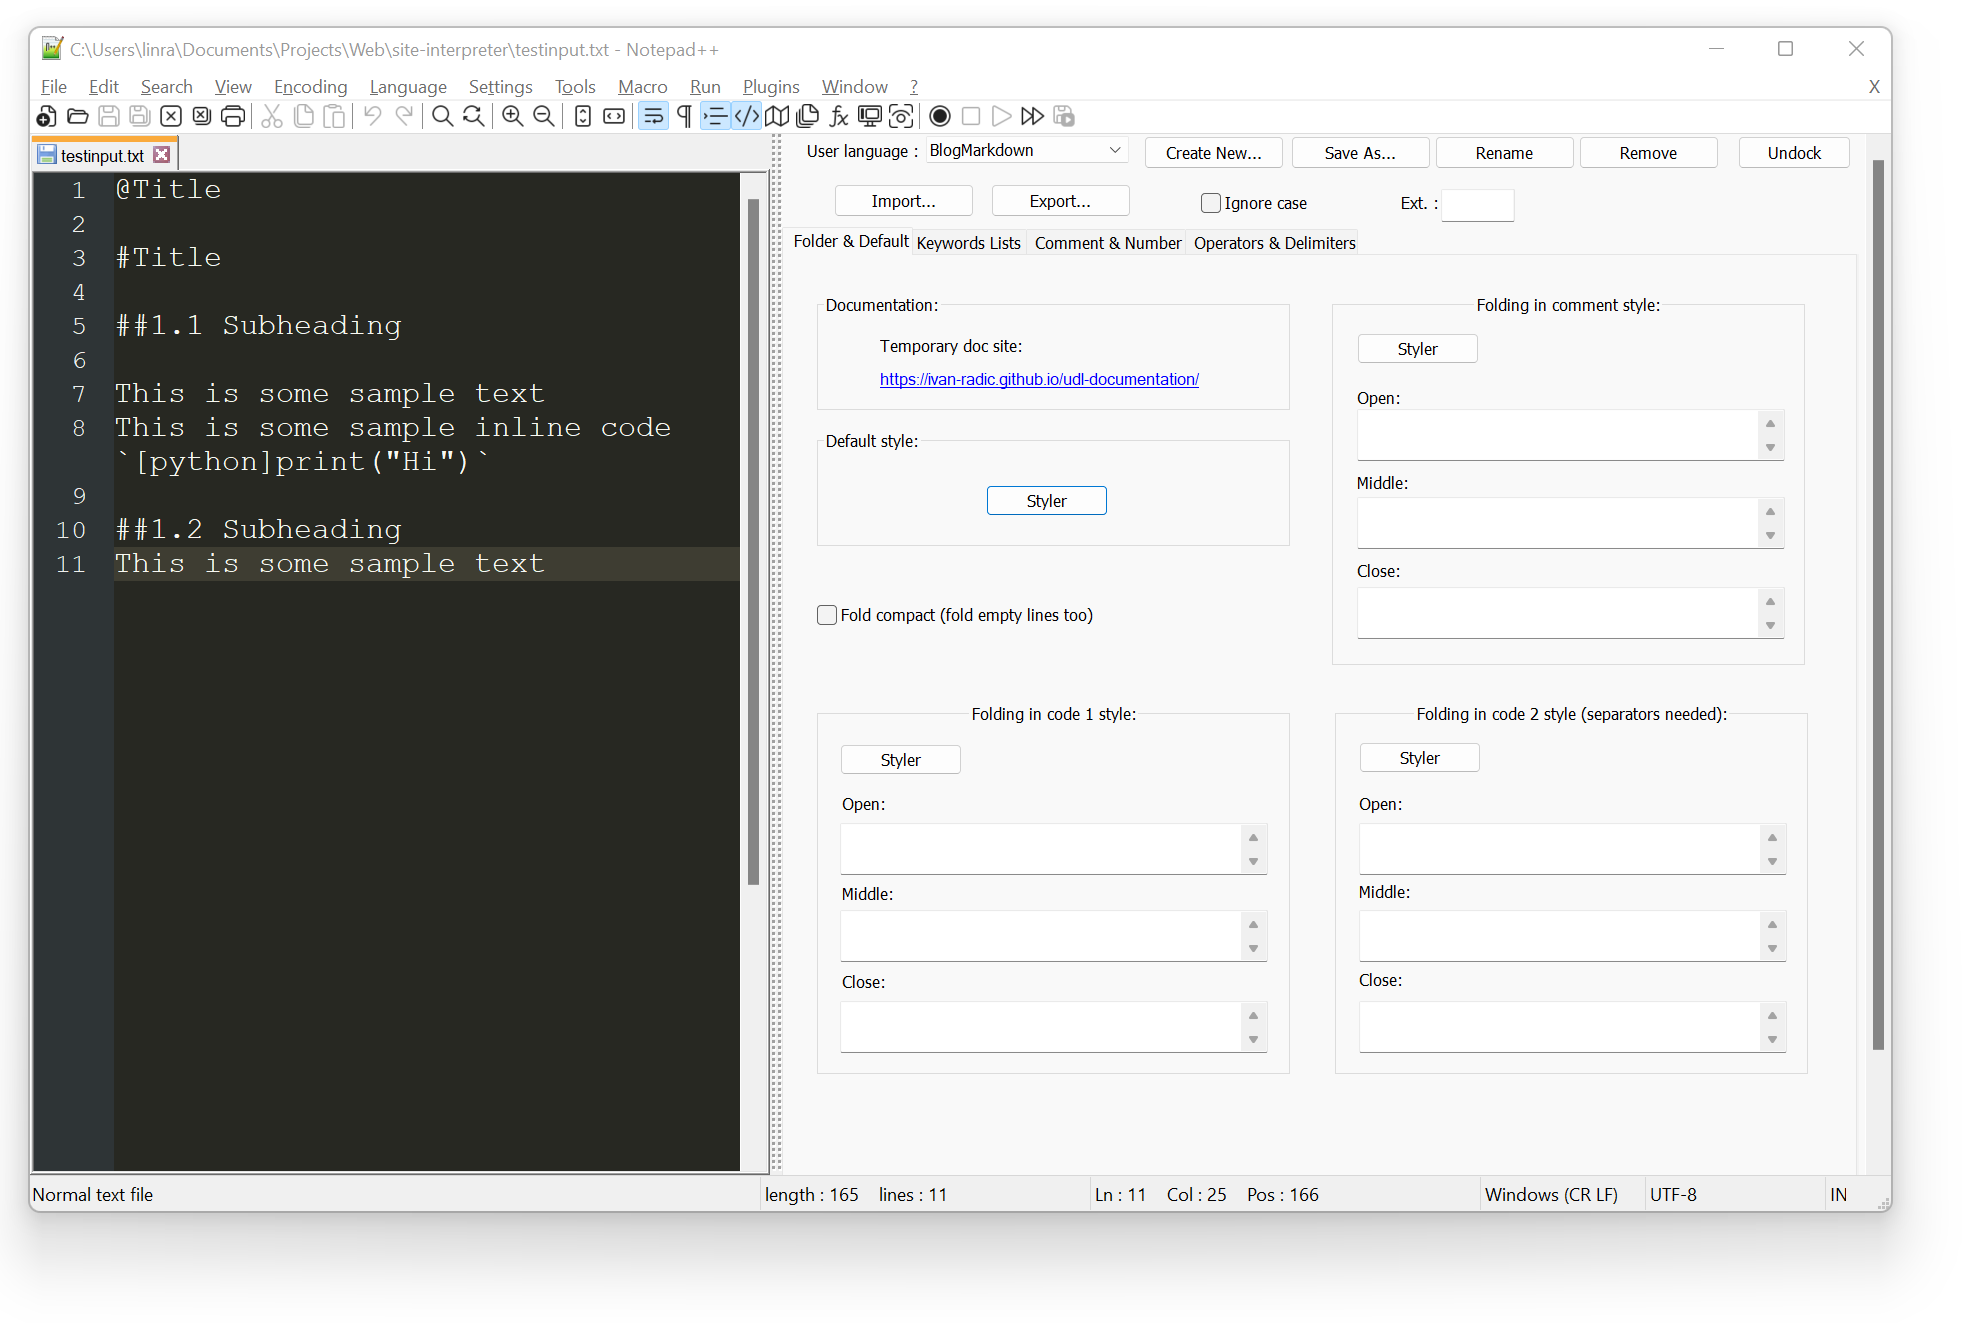
I went and played around a bit with some other Notepad++ settings, set the backdrop to a dark theme, and made the default text white with a transparent highlight using the built-in styler.
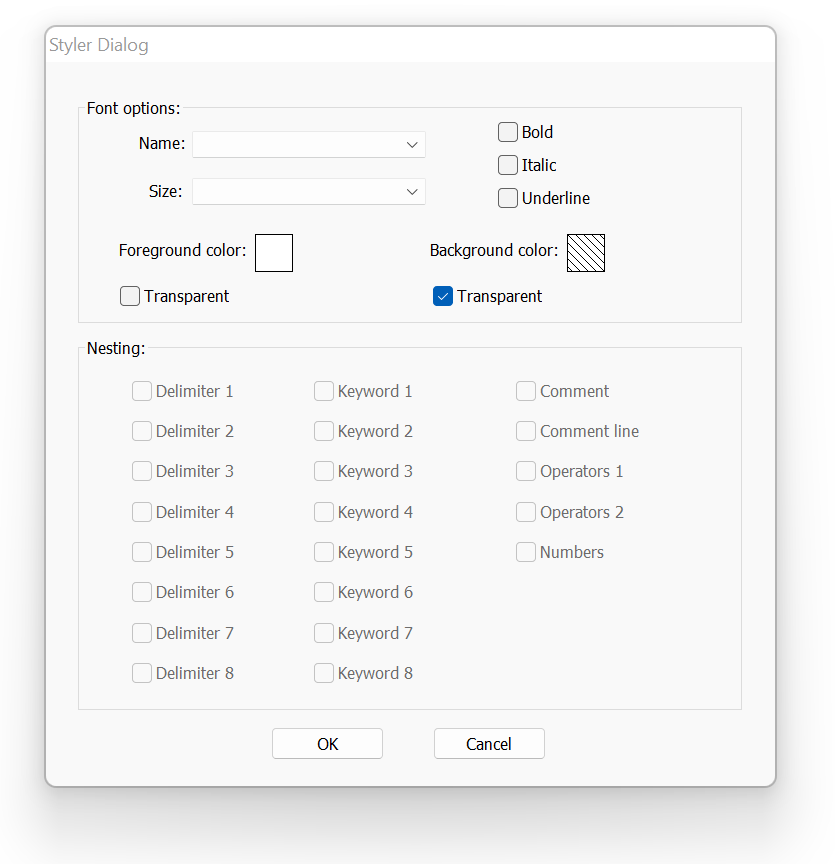
Next we add styles to some of the simpler elements. The best way I found to do this (at least for my purposes) is with the delimiter styles in the tab titled "Operators & Delimiters." For bold, italicized, and code text, we can define their selections with the open and close delimiters and use the built-in styler to pick out a colour for highlighted syntax. Notice that we only need to use one set of delimiters for both multiline and inline code, because the inline code delimiter also selects the multiline delimiters.
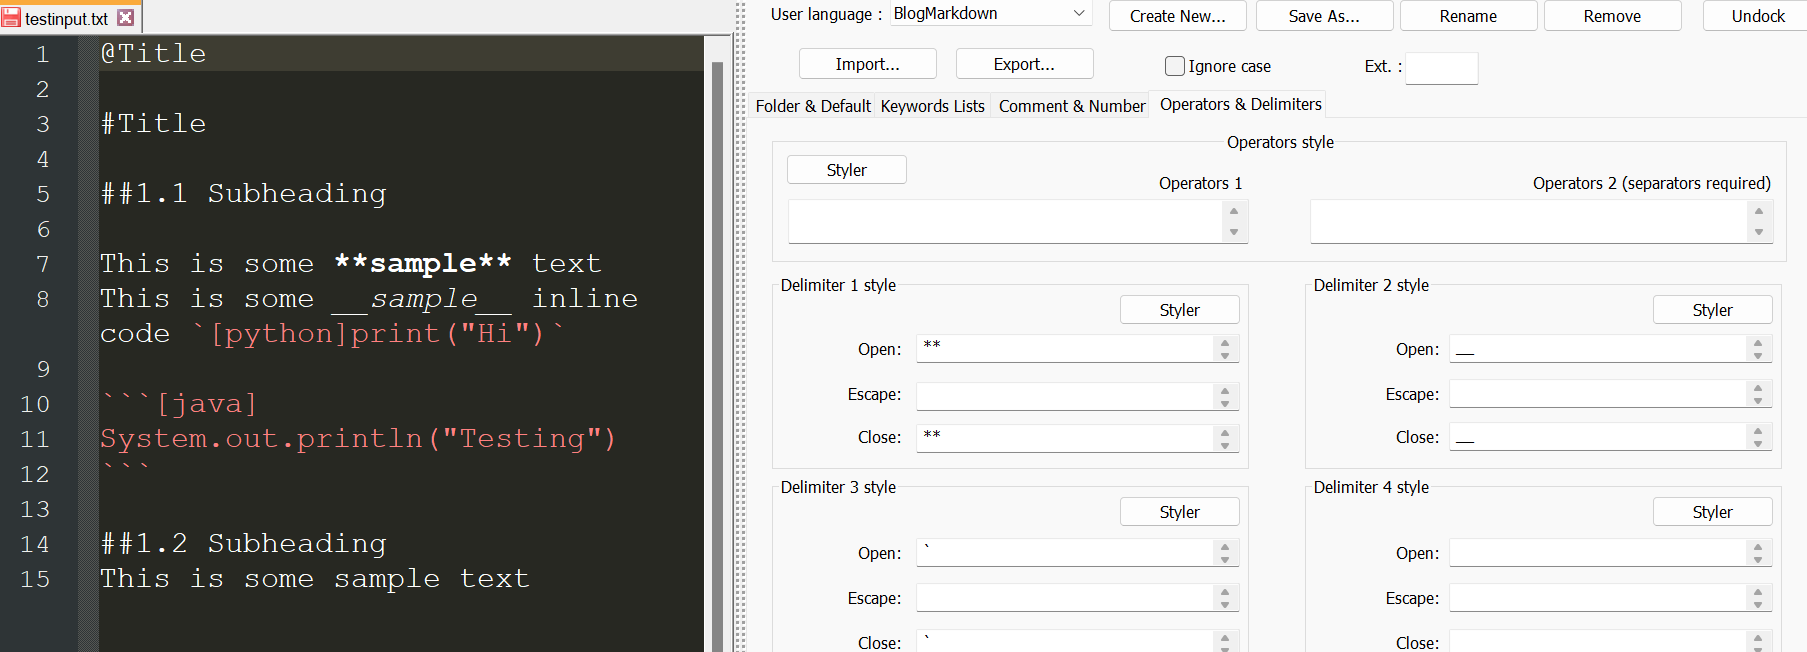
For styles that don't have a close delimiter and instead stop at the end of a line, we can set the close delimiter as ((EOL)), instructing the syntax highlighting to stop upon a newline. This allows us to add syntax highlighting for our image, header, and subheader tags.
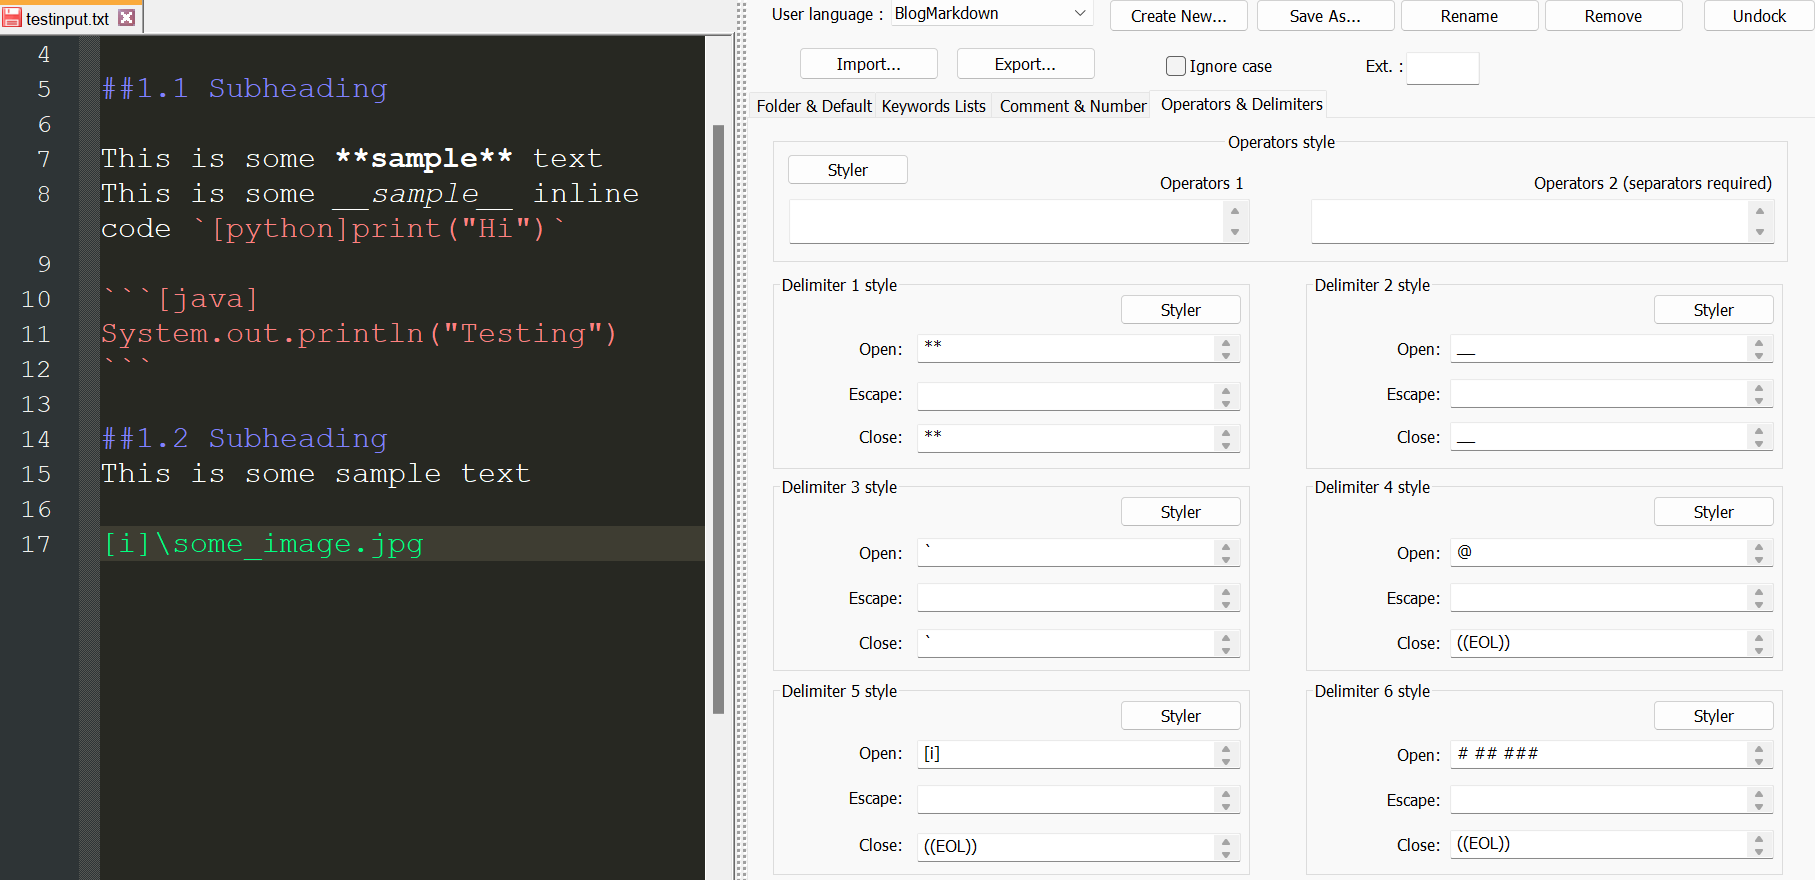
If you want to import the markup formatting I have, you can find the .UDL file for the user defined language in the project files. After downloading, import the UDL file in the language definition window.
1.4 Final thoughts
So that's it! We're finally finished the text interpreter and our custom syntax highlighting. Now, we can create blog posts on our site significantly faster (and with many less headaches) than if we stuck with the original code-editing method.
If I were to approach this project again, I would explore an easier and more efficient method of replacing our custom tags (perhaps entirely using regular expressions) instead of looping through every line which is slow, code-dense, and unideal for multiline commands like our block code. I'd also consider implementing a live editor system where changes are updated live rather than after a rerun of the Python script. I suspect this might work best with Javascript instead of Python, but I'm short on time to rewrite this project, so I'll leave it as a challenge for another day.
1.5 Resources
You can find the Github repository for this project here.