Building a Tetris Clone with C++ SFML
Over the past few months, I've been playing quite a bit (maybe too much) multiplayer Tetris, and I've become reasonably familiar with the mechanics of the game. I'm interested in expanding my C++ skills beyond competitive programming to include development with a visual library, so I've decided on creating a Tetris clone. Hopefully, I'll be able to gain some valuable game development skills and develop a better understanding of a game that I've spent quite some time on.
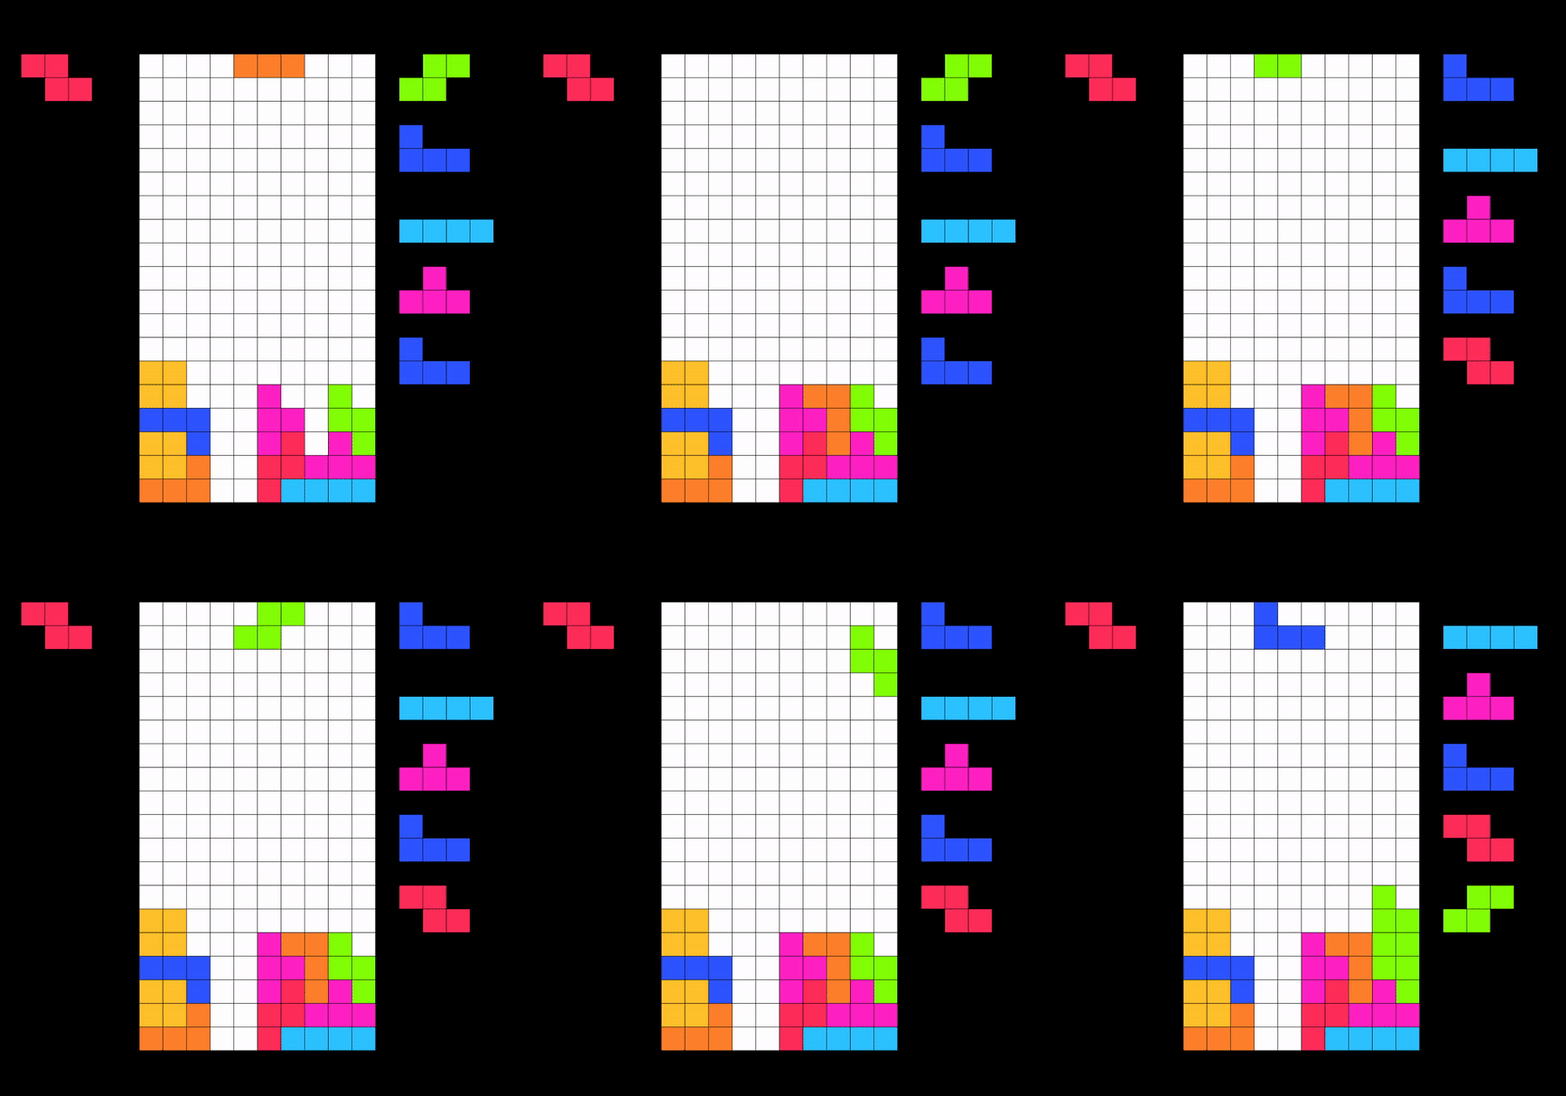
1.1 Setting up SFML
SFML (Website) is a simple software development library for C++. Importantly, it supports keyboard input, basic 2D graphics, and text rendering, all of which I'll be using for this project. Unfortunately, SFML isn't super easy to setup from scratch on my preferred IDE (Visual Studio Code), so instead I found an online boilerplate that I'll use as a starting point to get the library off the ground. As my compiler, I used the MINGW-64 C++ 17 compiler, available at here.
After installing the boilerplate and struggling a bit with the SFML setup, I was finally able to get a basic program working. The code for this test program is included within the boilerplate.

Before moving onto the more interesting parts of this project, let's take a look at the SFML syntax for another basic program (which prints a rectangle onto the screen) and try to get a better understanding what each line of code does.
#include "Platform/Platform.hpp"
#include <Main.h>

using namespace std;
using namespace sf;

int main()
{
    RenderWindow window(VideoMode(500, 500), "Sample Program");
    RectangleShape rect;
    rect.setFillColor(Color::Red);
    rect.setPosition(Vector2f(200,200));
    rect.setSize(Vector2f(50,50));

    Event event;
    while (window.isOpen())
    {
        while (window.pollEvent(event))
        {
            if (event.type == Event::Closed)
                window.close();
        }

        window.clear();
          window.draw(rect);
        window.display();
    }
    return 0;
}
We start by importing header files with #include. The first header file comes from the boilerplate, and configures the code to work with SFML on our particular platform (in this case, Windows). The second header file is the header that corresponds to Main.cpp, where our code is going to be written. This file is empty for now, but keep it in mind, since we'll be using headers quite a bit going forward. We can also import the necessary namespaces here.
#include "Platform/Platform.hpp"
#include <Main.h>

using namespace std;
using namespace sf;
Within main, we create a RenderWindow with dimensions 500px by 500px. This is the canvas on which we will draw the rest of our visuals. Then, we create a RectangleShape object, set its fill colour to red, set its size to 50px by 50px, and set its position to (200, 200). Positions are defined from the top left of the canvas, so this rectangle will be drawn with its top left corner 200px from the top and 200px from the left of the canvas.
RenderWindow window(VideoMode(500, 500), "Sample Program");
RectangleShape rect;
rect.setFillColor(Color::Red);
rect.setPosition(Vector2f(200, 200));
rect.setSize(Vector2f(50,50));
We initialize a Event object to track window events (a keypress, for example) and define a while loop within which each frame of our game will run. Using an additional while loop, we check for events that have been triggered on the given frame.
The last three lines of this while loop are crucial in making our program work. First, we clear the window for anything drawn on it from the previous frame. Next, we draw the rectangle that we want to display. Lastly, we finalize all of the changes we made this frame by displaying it to the user.
window.clear();
window.draw(rect);
window.display();
When we run the program, the following is displayed.
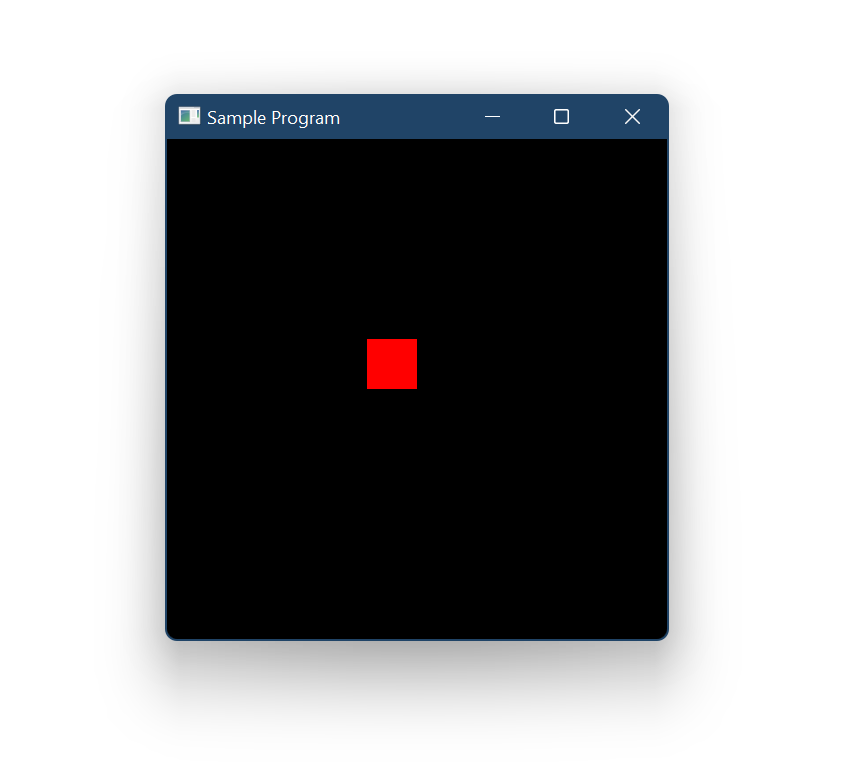
Going forward, I won't be explaining each step in as much detail as for this program, but all of the concepts we just covered are still applicable.
1.2 Mini-project: Sorting Program
To test out my newfound SFML skills in preparation for the more complex Tetris project, I created a basic sorting visualization program. Feel free to skip this section if it doesn't seem interesting to you.
I start by coding up a bubble sort program. If you don't know this algorithm already, I recommend checking out https://www.geeksforgeeks.org/bubble-sort/ to learn a bit about it. The essence of bubble sort is the swapping of adjacent elements until the list is in sorted order. The algorithm has a worst case time complexity of N2 (ie. in the worst possible case, bubble sort will take the N, the number of elements, squared iterations to sort the list).
To visualize our bubble sort algorithm, I create a list of RectangleShape objects alongside our list of elements. Every frame, the program calls the update_bars() function (shown below), which matches the list of elements with the heights of the bars.
void update_bars()
{
    for (int i = 0; i < 200; i++)
    {
        v[i].setSize(Vector2f(1, h[i]));
        v[i].setPosition(Vector2f(i, 200 - h[i]));
    }
}
Now, we call the bubble sort algorithm asynchronously using the C++ thread module. Threading, which is what this is called, is the execution of multiple code "pathways" (threads) at the same time. We use threading in this program because it allows us to create delays between sorting moves without blocking-up the main while loop.
Consider the following program. We increment a counter once every second, and every frame (iteration of the while loop) we print out the current value of the counter. Your first guess as to how we might write this program might look something like this.
int c = 0;
while(true){
    c++;
    sleep(1);
    print(c);
}
But wait! Instead of printing once every frame, our program is actually printing once every second, because the sleep function is delaying everything after it by one second. This program doesn't do what we want it to.
If we use threading, we can avoid this problem by executing two code blocks at the same time - one which increments the counter once every second, and another which prints the counter on every frame.
void fun(){
    while(true){
        c++;
        sleep(1);
    }
}

int main(){
    thread t(fun);
    while(true){
        print(c)
    }
    t.join();
}
This is exactly what we need to do for our sorting program. One function does the sorting (and changes the colours), and we reserve the main loop for displaying the frames.
    thread t(bubble_sort);

    Event event;
    while (window.isOpen())
    {
        ...
        update_bars();
        for (auto& r : v)
            window.draw(r);

        window.display();
    }
    t.join();
When we put it all together, our output looks something like this.
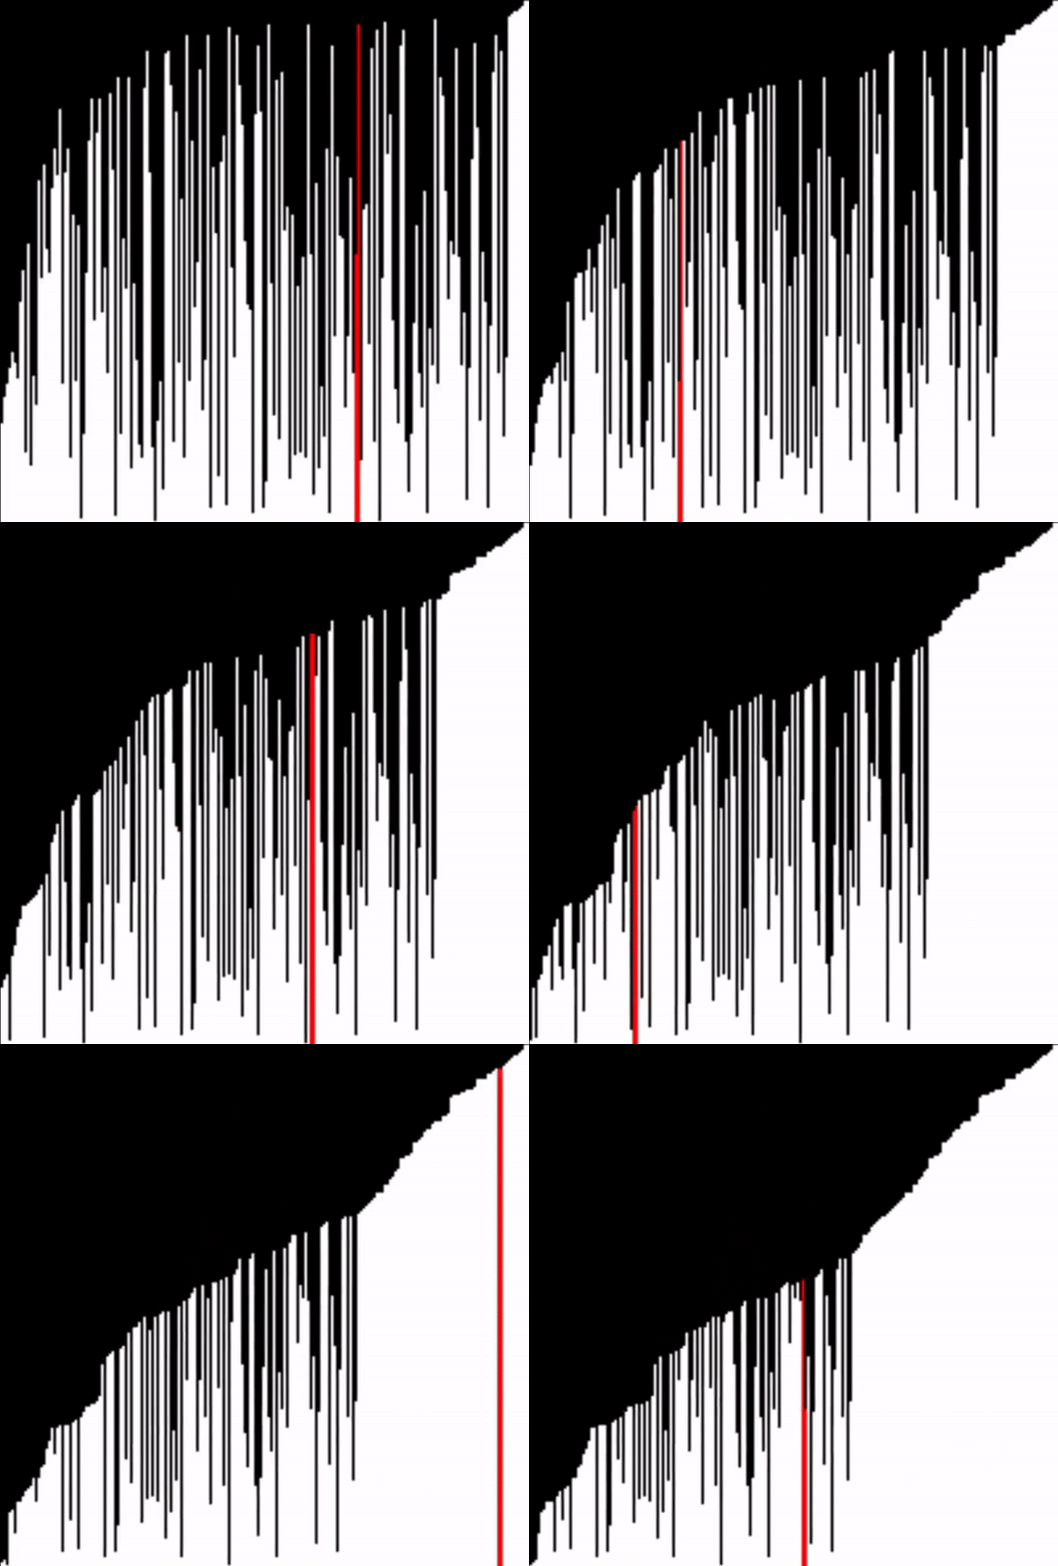
I repeated this process for insertion sort as well.

Before we move onto creating the actual Tetris game, I'd like to explore a brief digression. During the process of coding this sorting visualizer, I ran into a rather curious error with the delay between sorting swaps.
When I set the delay between swaps to be greater or equal to 1000 microseconds, the sorting worked as normal, but as soon as the delay went below 1000, the program would appear as if it instantly sorted the list with no delay.
v[j].setFillColor(Color::Red);
usleep(999);
v[j - 1].setFillColor(Color::White);

After a bit of searching, I came across this thread, where user Steven Schveighoffer helpfully writes "Windows only supports millisecond resolution." It's therefore impossible to sleep for less than one millisecond, and the error I was getting was due to the program rounding 999 microseconds down to zero.
I still wanted to set my delay to below 1 millisecond, though, so I came up with a workaround where I try to approximate a shorter delay by forcing the program to loop 1,000,000 times. This trick works for what I'm using it for, but it does lead to some inconsistencies in the speed of sorting, because the time it takes to loop for one million iterations differs based on the system load.
void pause()
{for (int i = 0; i < 1000000; i++){}}
2.1 Creating the game board
I started, as before, by creating a blank canvas of desired dimensions and setting up the frame while loop.
Then, I got to work creating a Block class which would form the basis for the board. This is where I ran into some interesting difficulties with C++ header files. I'll try and summarize what I learned below. Feel free to skip if you already understand header files and object oriented programming (OOP) in C++.
To start, some context: I haven't worked much with OOP in the past in languages other than Java. In Java, there isn't the need for header files when creating classes. You can simply write a class file and reference it from any other context, as long as it is in the same directory. In fancy terms, the "Java compiler compiles class definitions into a binary form that retains all the type information through to link time (from the Oracle website)."
The C++ compiler is different in that it compiles each file independently of one another. Any given C++ class doesn't know that any other class exists and is unable to reference it without a direct link to its contents. This is where header files come in handy.
A header file tell us what is contained within a C++ file so that when it are imported into another class, the class immediately knows which functions and methods it can reference. The header function for my Block class is shown below.
#ifndef Block_H
#define Block_H

#include "Platform/Platform.hpp"
using namespace std;
using namespace sf;

class Block
{
public:
    Block();
    Block(int x, int y, Color c);
    void setColor(Color c);
    void render(RenderWindow& w);

private:
    int x, y;
    RectangleShape shape;
};

#endif
Notice how we don't provide any of the actual code for the methods defined; that goes in the C++ file, not the header. Now that we've created the header file, when we want to reference this class from another file, we can import it with the following code:
#include "Block.hpp"
We also need this line at the top of our Block.cpp class, to link the header and the file together.
As another aside, these lines at the top of the header file are called guards. They help us avoid errors when same function or variable is defined more than once.
#ifndef Block_H
#define Block_H
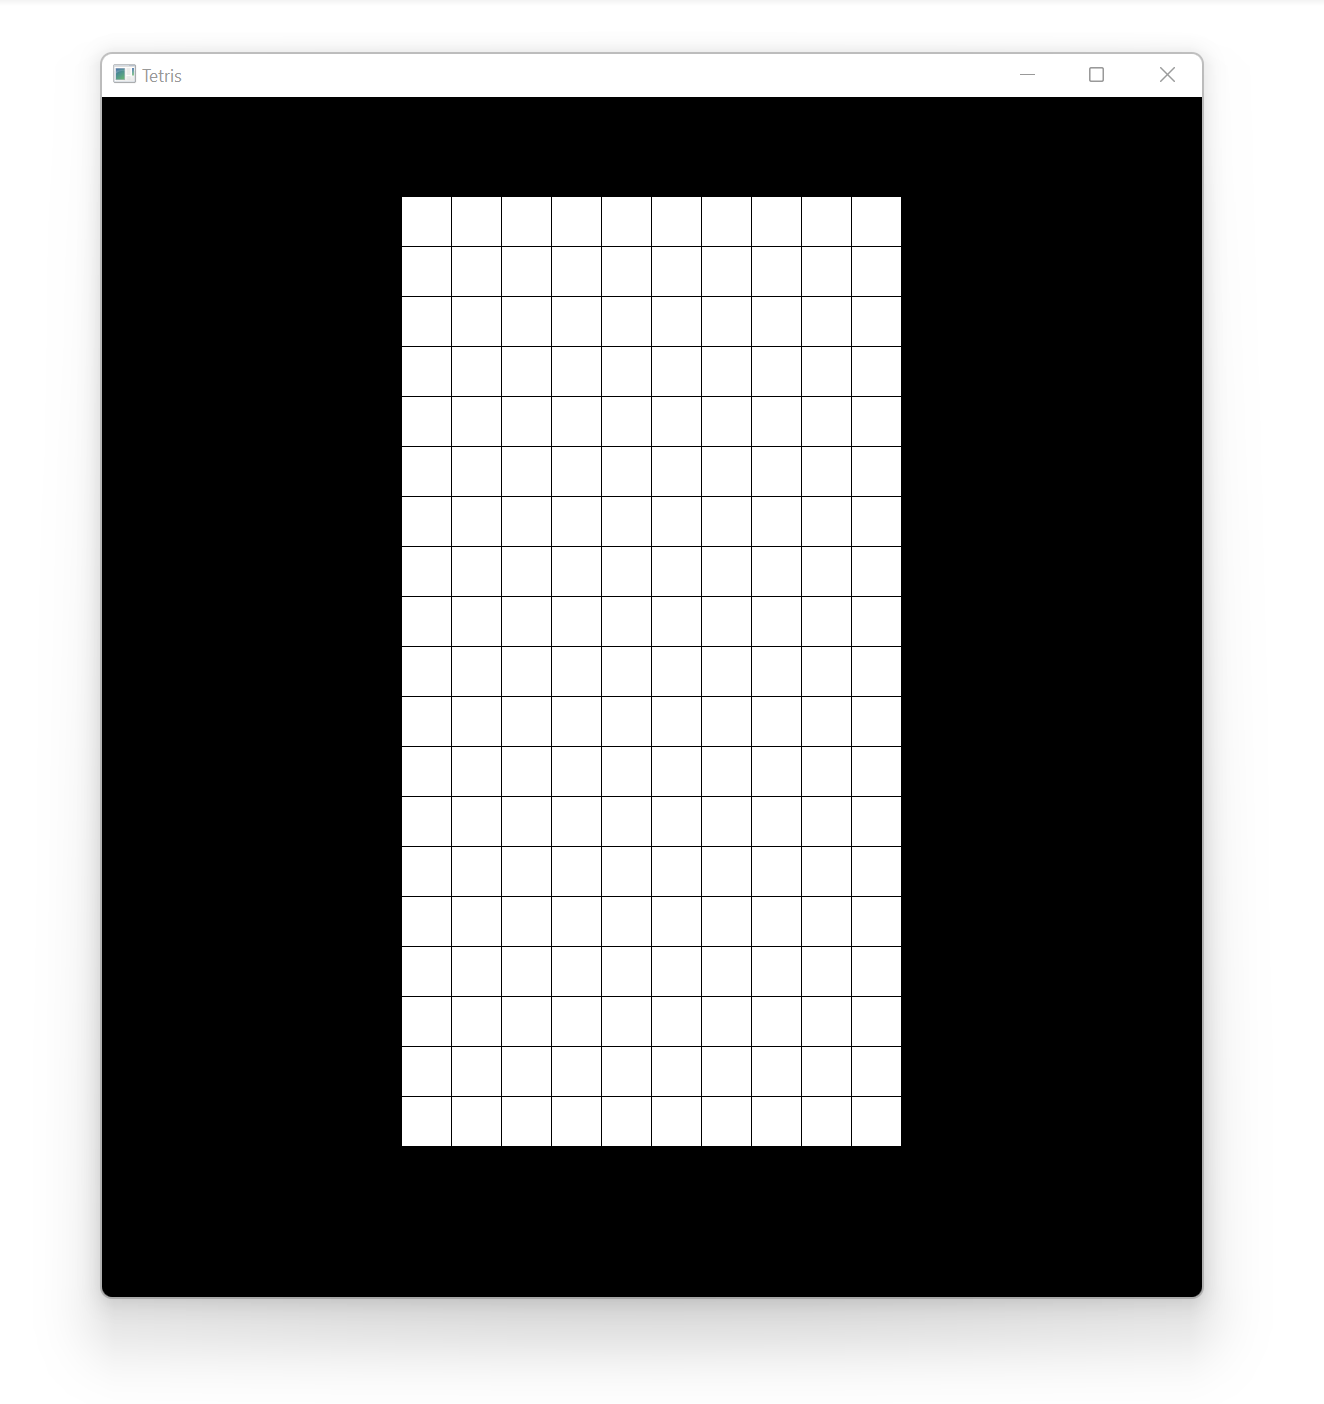
Now that we understand header files and classes in C++, we can move onto creating the grid for our program, which is just an 2 dimensional array of blocks. I created a new class named Grid to store all related methods and data.
int w, h, x, y;
vector<vector<Block>> gui;
We also need to write a render() function to render the grid to our window. This is done by looping through all blocks and calling the render function on each.
void Grid::render(RenderWindow& window)
{
    for (int i = 0; i < w; i++)
    {
        for (int j = 1; j < h; j++)
        {
            gui[i][j].render(window);
        }
    }
}
When we run our program, we end up with a window that looks like this.
2.2 Displaying pieces
As a refresher, Tetris has 7 distinct pieces, called tetrominos or minos, for short. Each piece is made up of exactly four blocks.
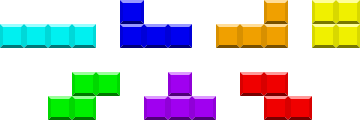
I started by creating a parent class (Tetromino.cpp) which stores common data and functions among all the tetrominos. The Tetromino class stores the following:
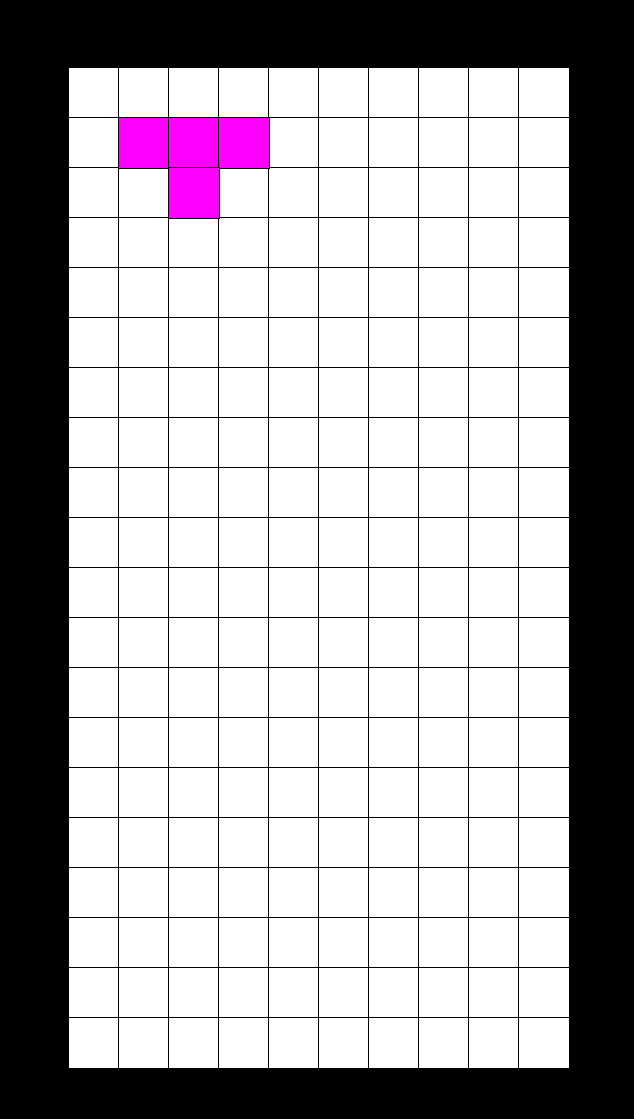
1. The initial x and y offset that the block spawns into the game with. For example, the T block spawns into the game with an offset of (3,0), as can be seen in the diagram below.

2. The x and y coordinates of the block (without accounting for the initial offset). In the image shown above, the T piece has coordinates (0,0).
3. The rotation state of the piece (a number from 0 to 3). This value increases with the number of clockwise rotations from the original spawning orientation of the block (denoted by 0). The Tetris Wiki has a good visual representation of each of the four rotation states for all of the 7 tetrominos in the game.
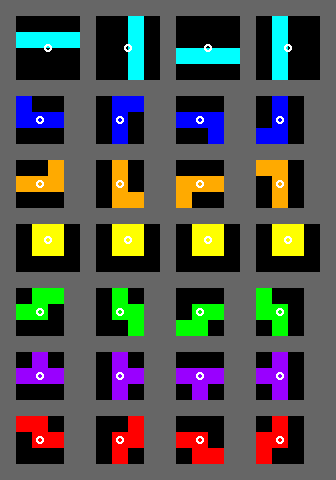
4. A 2D vector containing the locations of the blocks of the piece in each of the four rotation states. For the L piece, the rotation matrix is shown below. The x and y coordinates are flipped here because of the way my grid is configured, but the general idea should be the same for any orientation.
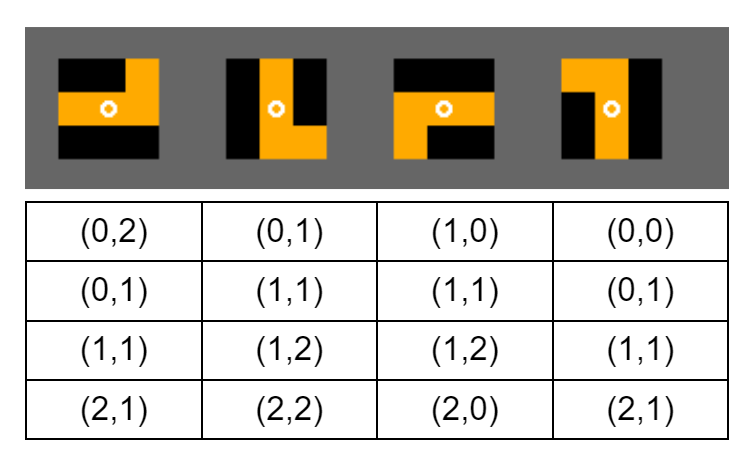
Inheriting from the Tetromino class are 7 classes representing each of the tetrominos. Below is the class declaration for the L tetromino.
lMino::lMino(int x, int y) :
    Tetromino(x, y, 0, 3)
{
    blocks = { { { 0, 2 }, { 1, 0 }, { 1, 1 }, { 1, 2 } }, //0
        { { 0, 1 }, { 1, 1 }, { 2, 1 }, { 2, 2 } }, //1
        { { 1, 0 }, { 1, 1 }, { 1, 2 }, { 2, 0 } }, //2
        { { 0, 0 }, { 0, 1 }, { 1, 1 }, { 2, 1 } } }; //3
}
Before we begin writing the code to display our Tetrominos on the grid, I'd like to change the way that we represent pieces on the grid. Instead of editing the Block objects of the grid directly whenever we want to change the colour of a square, I'll create a separate 2D vector of chars within our Grid class which will store a character corresponding to the mino which is covering the current block.
vector<vector<char>> grid;
We need to write a function to apply our character matrix to the blocks of the grid. This code is not as clean as I would like it to be (we could probably do away with the hardcoding and instead store these colours somewhere), but it'll make do for what we need it for.
void Grid::updateBlock(int i, int j)
{
    switch (grid[i][j])
    {
        case 't':
            gui[i][j].setColor(Color(255, 34, 195));
            break;
        case 'i':
            gui[i][j].setColor(Color(45, 193, 255));
            break;
        case 's':
            gui[i][j].setColor(Color(129, 255, 6));
            break;
        case 'z':
            gui[i][j].setColor(Color(255, 45, 89));
            break;
        case 'o':
            gui[i][j].setColor(Color(255, 193, 44));
            break;
        case 'j':
            gui[i][j].setColor(Color(46, 85, 255));
            break;
        case 'l':
            gui[i][j].setColor(Color(255, 128, 44));
            break;
        default:
            gui[i][j].setColor(bg);
    }
}
In order to display our Tetrominos on the grid, we need to write a function in the Tetromino class which draws the piece (shown below). Here, we loop through every piece of the mino in its current orientation and edit the character array accordingly.
void Tetromino::drawMino(Grid& grid)
{
    for (pair<int, int> p : blocks[rot])
    {
        grid.editGrid(y + p.second + ystart, x + p.first + xstart, code);
    }
}
Calling our drawMino function with a test T tetromino yields the following result. Success!
2.3 Basic rotation and movement
Let's start by actually allowing the player to rotate the piece using the rotate keys. I'll write two very simple functions which changes our rotation state variable based on the direction of rotation.
void Tetromino::rotCW()
{
    rot = (rot + 1) % blocks.size();
}

void Tetromino::rotCCW()
{
    if (rot == 0)
    {
        rot = blocks.size() - 1;
    }
    else
    {
        rot--;
    }
}
When we rotate our pieces, we need to check that a rotation is valid (ie. we are not rotating the piece into a position that has already been filled). The function validFit loops through the new position of each block and checks whether a piece is already located there. If so, the placement is illegal.
bool Tetromino::validFit(Grid& grid)
{
    for (pair<int, int> p : blocks[rot])
    {
        int ny = y + p.second + ystart, nx = x + p.first + xstart;
        if (!grid.inBounds(ny, nx) || !grid.isEmpty(ny, nx))
        {
            return false;
        }
    }
    return true;
}
Now we can combine the two methods that we just wrote. I'm making a new class to store this new method, named GameManager, because we want all of our user-facing commands (ones that respond to user input) to be in one place.
void GameManager::rotCW()
{
    curr.wipeMino(grid);
    curr.rotCW();
    if (!curr.validFit(grid))
    {
        curr.rotCCW();
    }
    curr.drawMino(grid);
}
The variable curr stores the tetromino that the user is currently controlling. I've also written a wipeMino method which wipes all blocks of a given tetromino. We use this here to wipes the previous position of our tetromino before drawing the new position. Counterclockwise rotation is not shown, but is written similarly.
The last thing to do is to connect our function with user input.
if (event.key.code == sf::Keyboard::Z)
    gm.rotCCW();
else if (event.key.code == sf::Keyboard::C)
    gm.rotCW();
We get the following output when we run our program. Everything seems to be working as intended.
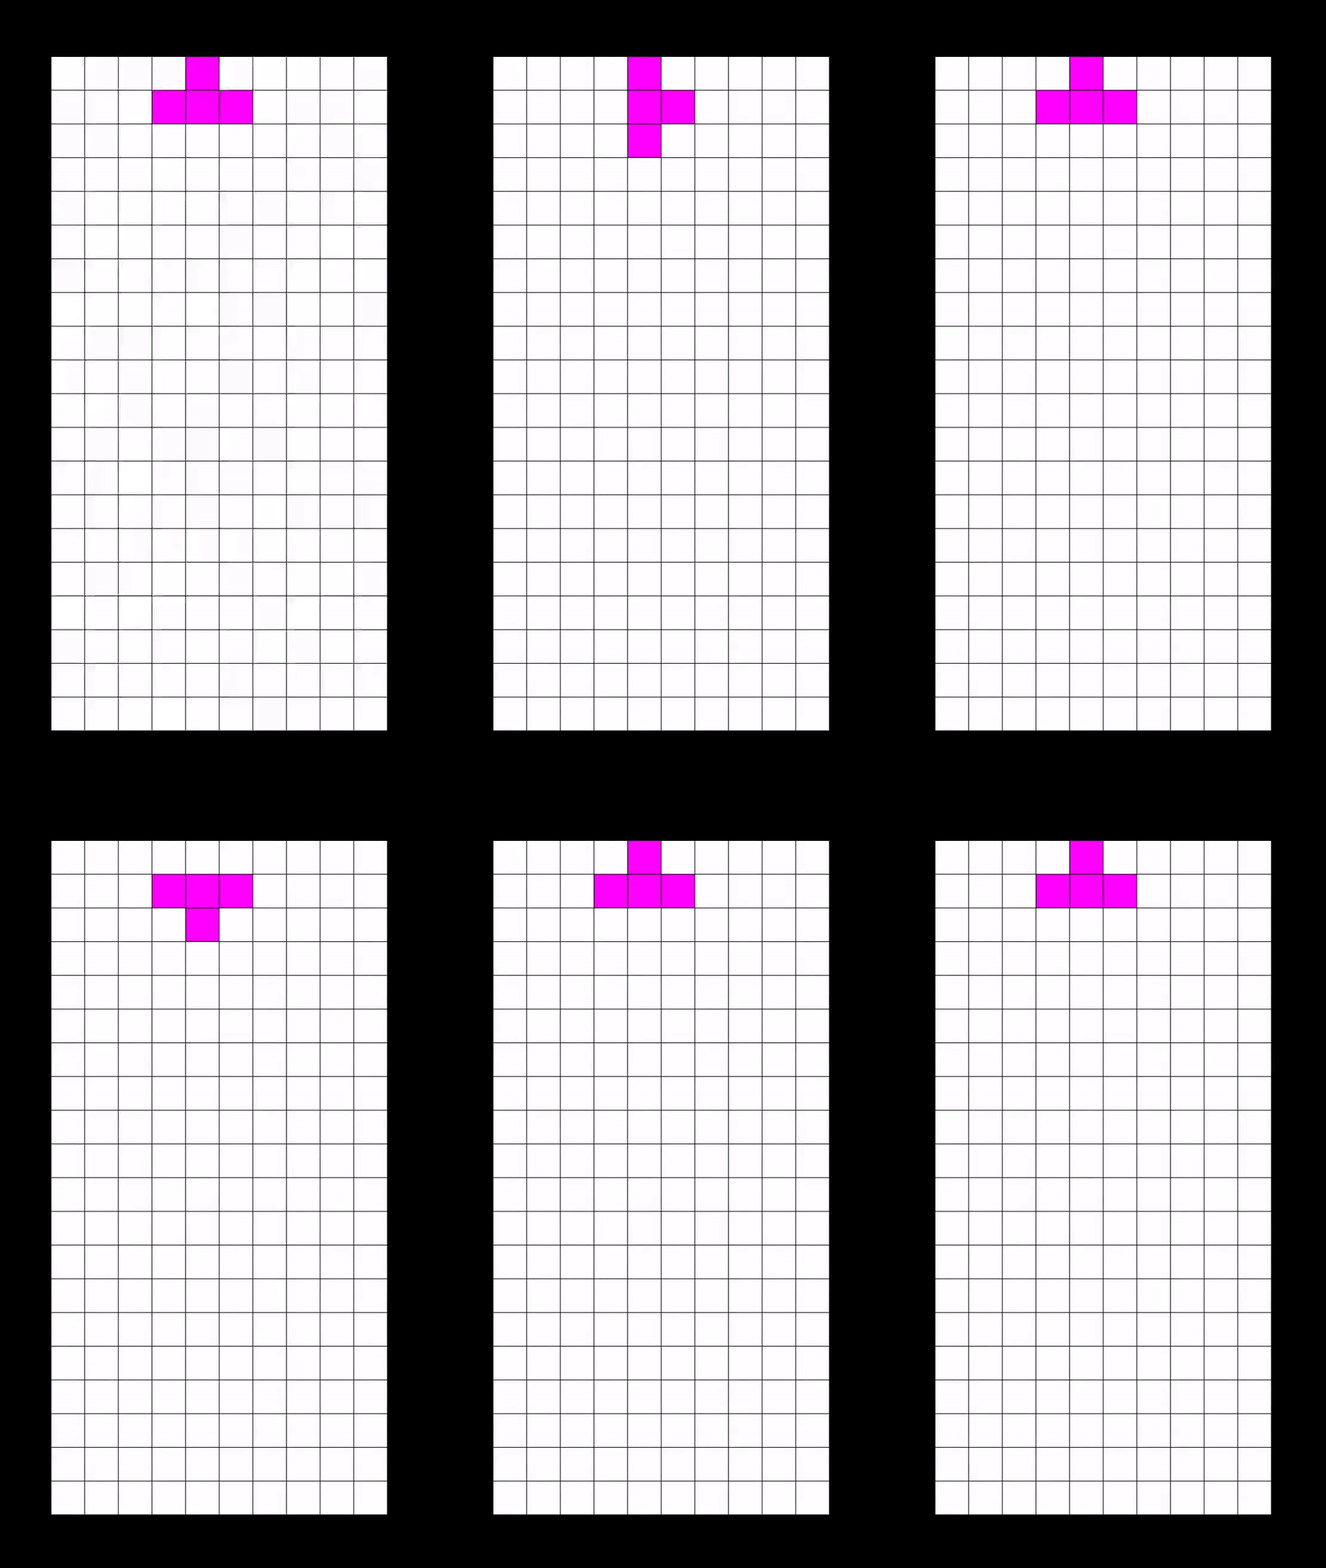
To make our pieces move laterally along the grid, we need to write a couple of extra methods, and link them each to keyboard inputs, just as we did before with our rotation methods.
void GameManager::moveRight()
{
    curr.wipeMino(grid);
    curr.translate(0, 1);
    if (!curr.validFit(grid))
    {
        curr.translate(0, -1);
    }
    curr.drawMino(grid);
}
The function translate(int dx, int dy) is a utility function which lets us change the x and y coordinates of a tetromino by dx and dy, respectively. Only the function for rightward movement is shown here, but leftward movement works in a similar way. After linking these functions up with keyboard inputs, we should be able to move our tetrominos both leftward and rightward.
Let's now think about downward movement. Until we implement soft dropping, the player won't have any control over downward movement, but we'll still need this function to implement gravity in the next section. We can start with a similar base function to moveRight() and moveLeft(), but we need to consider the case where the tetromino lands atop another piece while moving downwards. In this case, the piece should lock in place and a new piece should be spawned.
...
if (!curr.validFit(grid))
{
    curr.translate(-1, 0);
    curr.drawMino(grid);
    spawn();
    return;
}
curr.drawMino(grid);
I wrote a bit of code to make the spawn function pick a random tetromino out of a vector containing all 7 possibilities. Don't worry too much about this though, because we'll change it later.
2.4 Gravity, hard drop, and soft drop
In Tetris, pieces are translated downwards at a fixed rate to simulate gravity. In our version, we'll apply our moveDown() function once every second to achieve this effect. To this end, we can use SFML's built in Clock class which allows us to measure elapsed time. As soon as the time elapsed since the last restart of the clock is greater than one second, we move the piece down.
if (g_clock.getElapsedTime().asSeconds() > 1)
{
    gm.moveDown();
    g_clock.restart();
}
After implementing this code block within the main while loop, our Tetris game looks something like this.
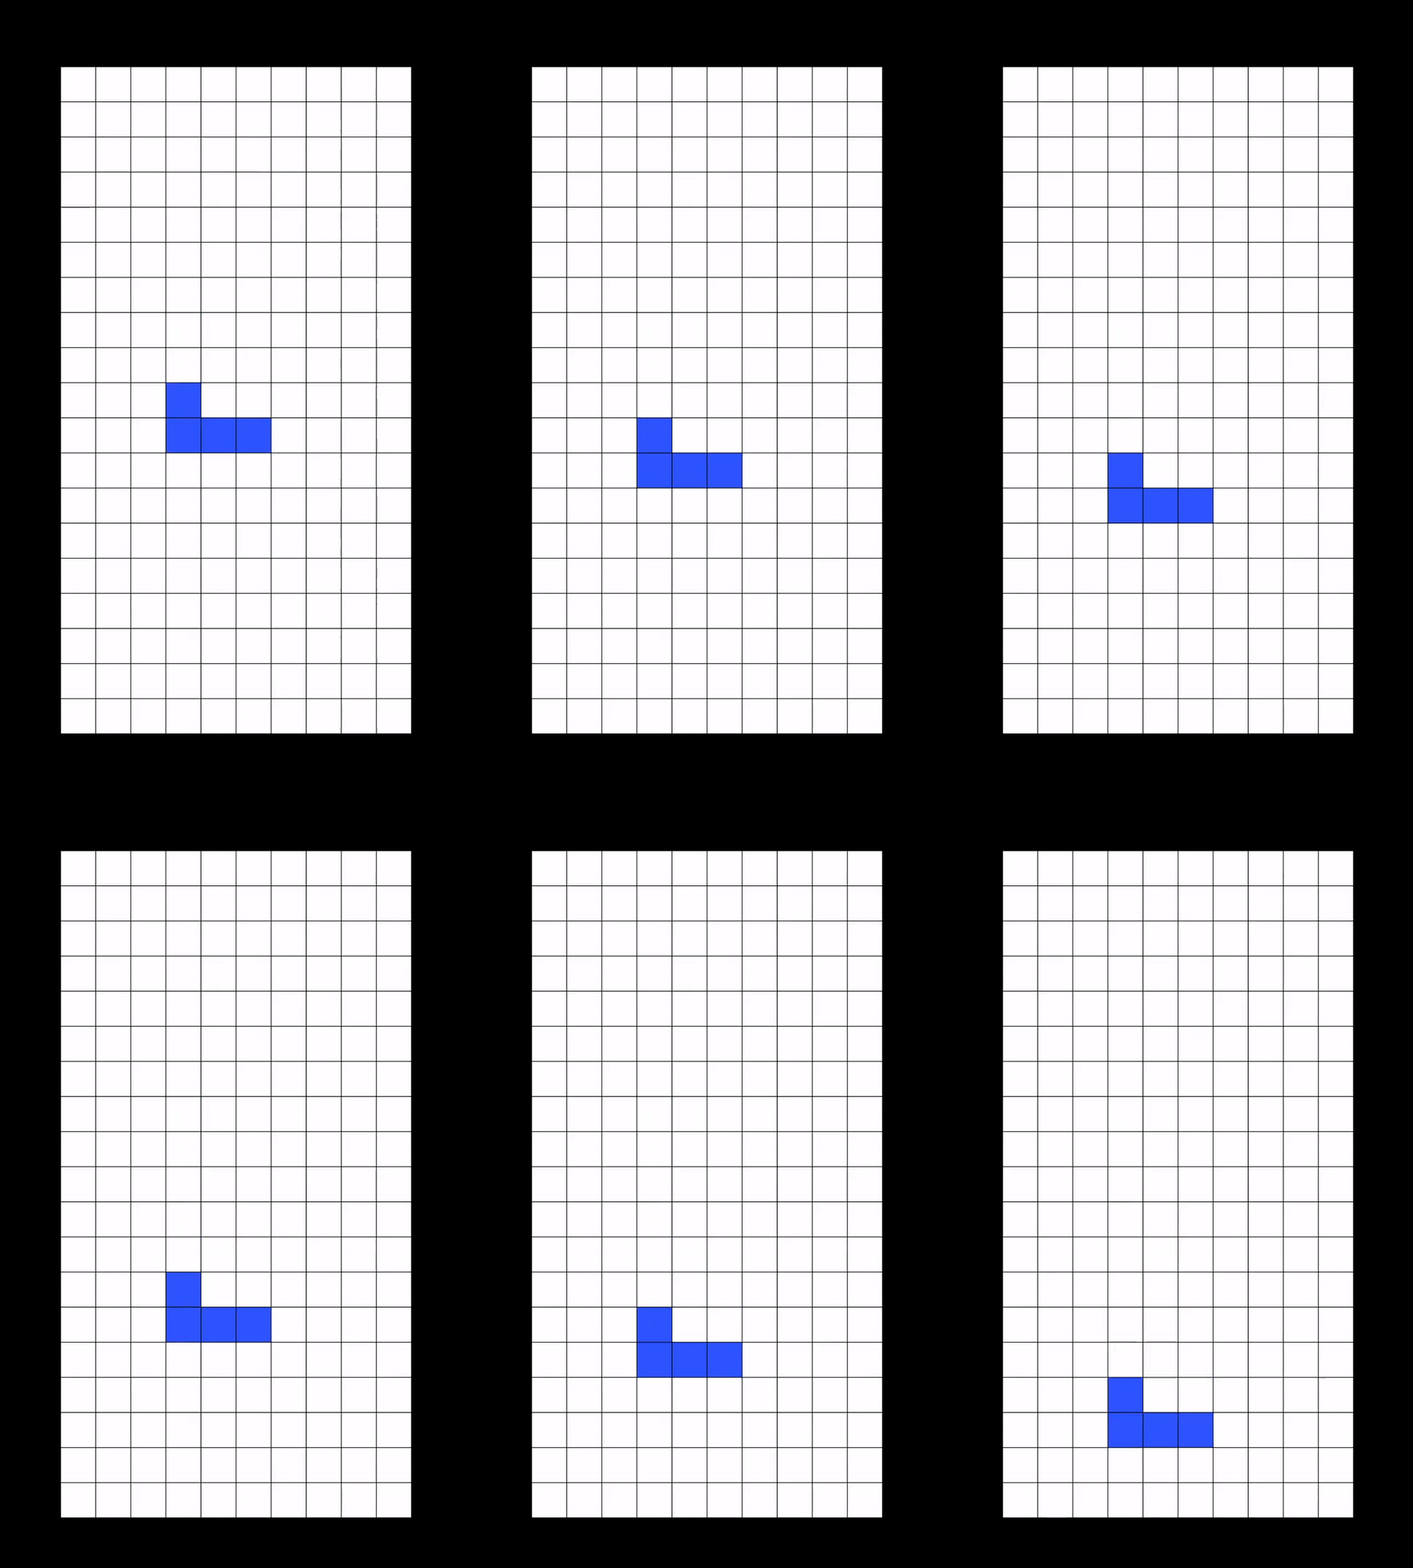
A hard drop is a move in Tetris where the tetromino drops instantly directly below its current position, after which it cannot be moved or rotated (see below). Hard dropping gives the player the ability to quickly move a piece to a desired position without needing to wait for gravity.
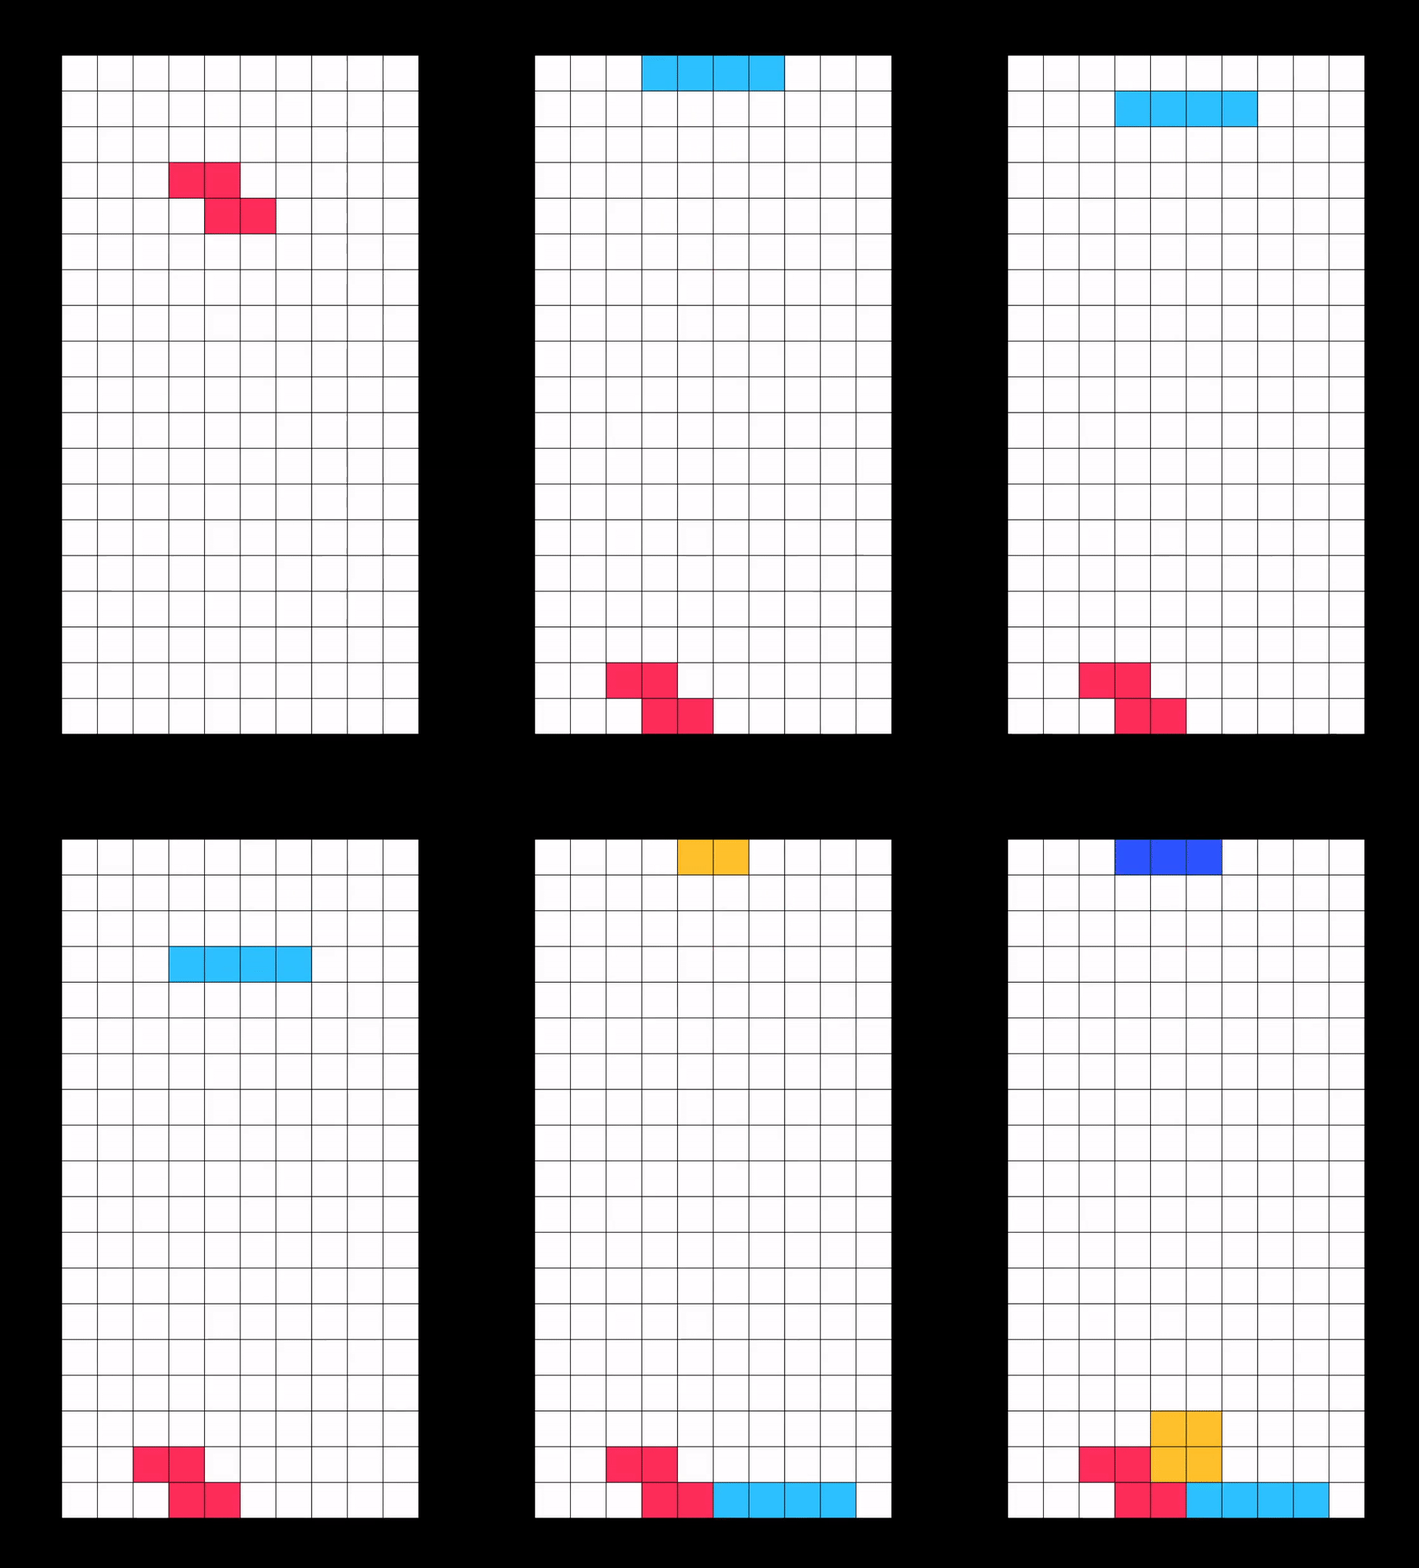
In our program, hard dropping is done by repeatedly translating our piece downward until it reaches an illegal position. At the end of our while loop, we translate the tetromino upwards by one unit to correct for the illegal move and bring our piece back to a valid position.
void GameManager::hardDrop()
{
    curr.wipeMino(grid);
    while (curr.validFit(grid))
    {
        curr.translate(1, 0);
    }
    curr.translate(-1, 0); //correction
    curr.drawMino(grid);
    spawn();
}
A soft drop is a move in Tetris where the tetromino speeds up its downward motion. The softDrop() function is almost identical to the moveDown() function, but it does not reset when the tetromino lands upon another piece. This allows the player to move and rotate the piece before it locks into place.
void GameManager::softDrop()
{
    curr.wipeMino(grid);
    curr.translate(1, 0);
    if (!curr.validFit(grid))
    {
        curr.translate(-1, 0);
    }
    curr.drawMino(grid);
}
The interesting part about the soft drop function is how we interface it with user input. My first inclination was to use events, similar to leftward and rightward movement, to control the soft drop speed. However, this method fails when we try to increase the soft drop speed, because the frequency of events is limited by the built-in Windows keyboard auto repeat rate.
Instead, we can use the SFML Keyboard module to determine whether the downward key is pressed on any given frame; if so, we can soft drop our piece one unit downward. We need to add a delay here, stored the variable sdf, to control the speed of our soft drop. This delay measures the amount of time, in milliseconds. between each subsequent piece move while the soft drop key is held down.
The limitation of this approach is that it isn't possible to make soft drop instantaneous, which is something that you might see on games like Jstris or Tetr.io. If we were to decrease sdf to zero, simply the press of the down button would instantly soft drop the next 2-3 pieces.
if (sf::Keyboard::isKeyPressed(sf::Keyboard::Down) and sdf_clock.getElapsedTime().asMilliseconds() > sdf)
{
    gm.softDrop();
    sdf_clock.restart();
    g_clock.restart(); //resets the gravity clock -> allows for movement and rotation along the surface
}
This method isn't perfect, but it is good enough for the purposes of this project.
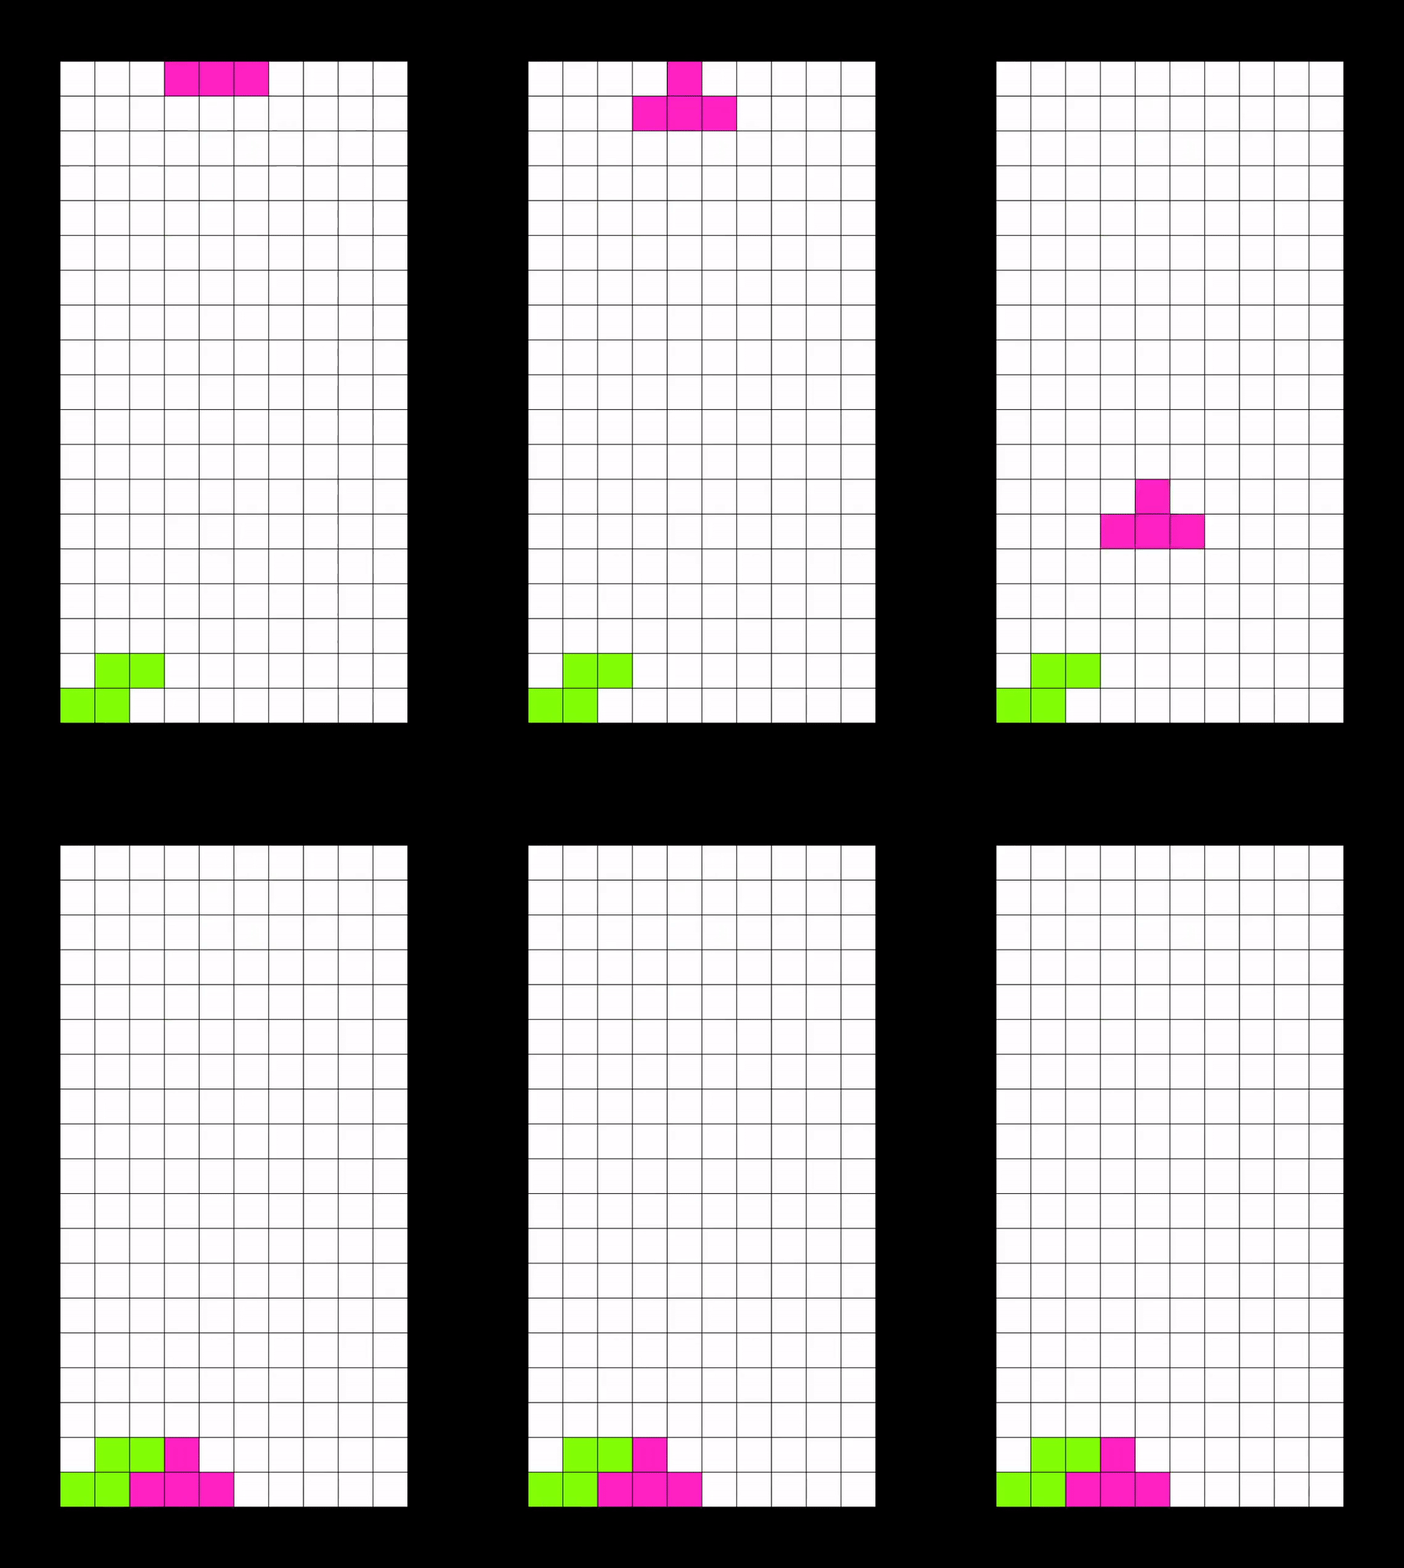
2.5 Clearing lines
In Tetris, whenever a row has been completely filled, it is cleared and all rows above it shift downward to fill its place. This is relatively simple for us to implement.
void Grid::clearFullRows()
{
    for (int i = 0; i < h; i++)
    {
        if (rowFull(i))
        {
            rowClear(i);
            shiftDown(i);
        }
    }
}
The rowFull() and rowClear() utility functions iterate over the elements of the row at index i, checking for or removing completed rows accordingly. The shiftDown() function moves all rows above the cleared row downward by one unit. Its implementation is as follows.
void Grid::shiftDown(int idx)
{
    while (idx > 0)
    {
        for (int i = 0; i < w; i++)
        {
            grid[i][idx] = grid[i][idx - 1];
        }
        idx--;
    }
}
As with many other parts of this project, this function could be optimized to be more performant (by only checking the rows affected by the last piece placement, for example).
2.6 Advanced movement (DAS)
If you've ever played a more modern Tetris game, you might have noticed that when you hold the left or right key, the tetromino jumps 1 unit, pauses for a moment, and then speeds towards the opposite wall (see below). This behaviour is called directional auto shift, or DAS for short. DAS is meant to make players' lives easier by helping them move pieces across the board quickly, while at the same time allowing for precise placement.

The logic behind DAS is a bit complicated in code-form, so let's first write out some pseudocode to get a better feeling for how it works.
int das: amount of time to hold until auto repeat begins (ms)
int arr: amount of time between each repeat while auto repeating (ms)

On the first press of the left button, call moveLeft()

If the left button has been held for longer than das, we begin to repeat moveLeft() with a delay of arr until the left button is released
Converting to code, our algorithm looks something like this.
if (sf::Keyboard::isKeyPressed(sf::Keyboard::Left))
{
    if (!left_das)
    {
        left_das = true;
        das_clock.restart();
        gm.moveLeft();
    }
    else if (das_clock.getElapsedTime().asMilliseconds() > das and arr_clock.getElapsedTime().asMilliseconds() > arr)
    {
        gm.moveLeft();
        arr_clock.restart();
    }
}
else{left_das = false;}
Once we have both keys implemented, we can tweak the arr and das numbers however we wish.
2.7 Bag system
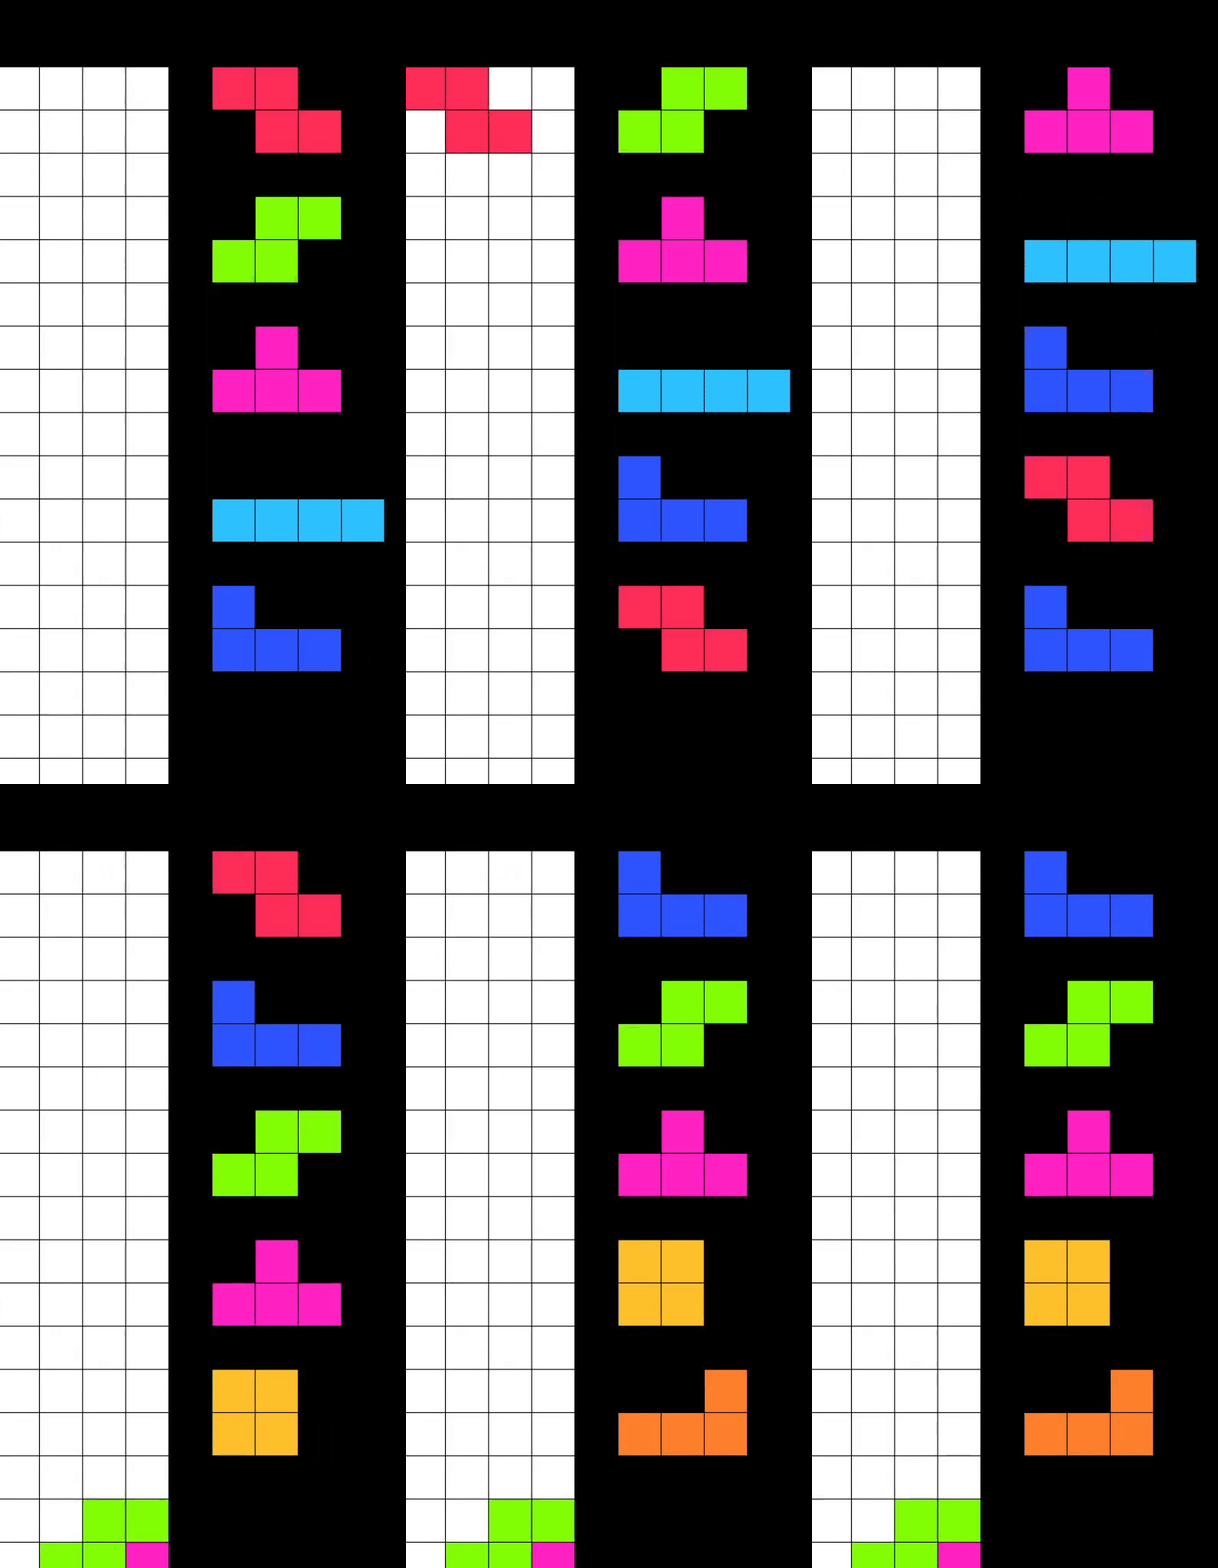
Let's move away from movement for a bit and take a look at our current piece generation algorithm, which picks a random tetromino from the set each time we need to spawn a new mino. The problem with this system is that it is possible (just by pure chance) that you could get two, three, or four of one piece in a row, or be starved of a particular piece quite some time. Frustrating, to say the least!
Thankfully, most Tetris games have come up with a solution for this problem - the 7 bag randomizer (or the Random Generator, as it is officially named). The Tetris Wiki explains this algorithm far better than I can:
"Random Generator generates a sequence of all seven one-sided tetrominoes (I, J, L, O, S, T, Z) permuted randomly, as if they were drawn from a bag. Then it deals all seven tetrominoes to the piece sequence before generating another bag."
The 7 bag randomizer prevents long sequences without a particular tetromino, because each piece is guaranteed to appear somewhere within each bag. The code for the generation of these bags is provided below.
void GameManager::genBag()
{
    unsigned seed = std::chrono::system_clock::now().time_since_epoch().count();
    shuffle(minos.begin(), minos.end(), default_random_engine(seed));
    for (auto& t : minos)
    {
        mino_q.push_back(t);
    }
}
We call the genBag() function once at the beginning of the game, and again after every 7 pieces has been used. This guarantees that there are at least 7 pieces within the queue at any given time, ensuring that the preview window will always be able to display the next 5 pieces.
If you're interested in learning more about the history of randomization in Tetris games, I highly recommend this article by Simon Laroche.
2.8 Bag system
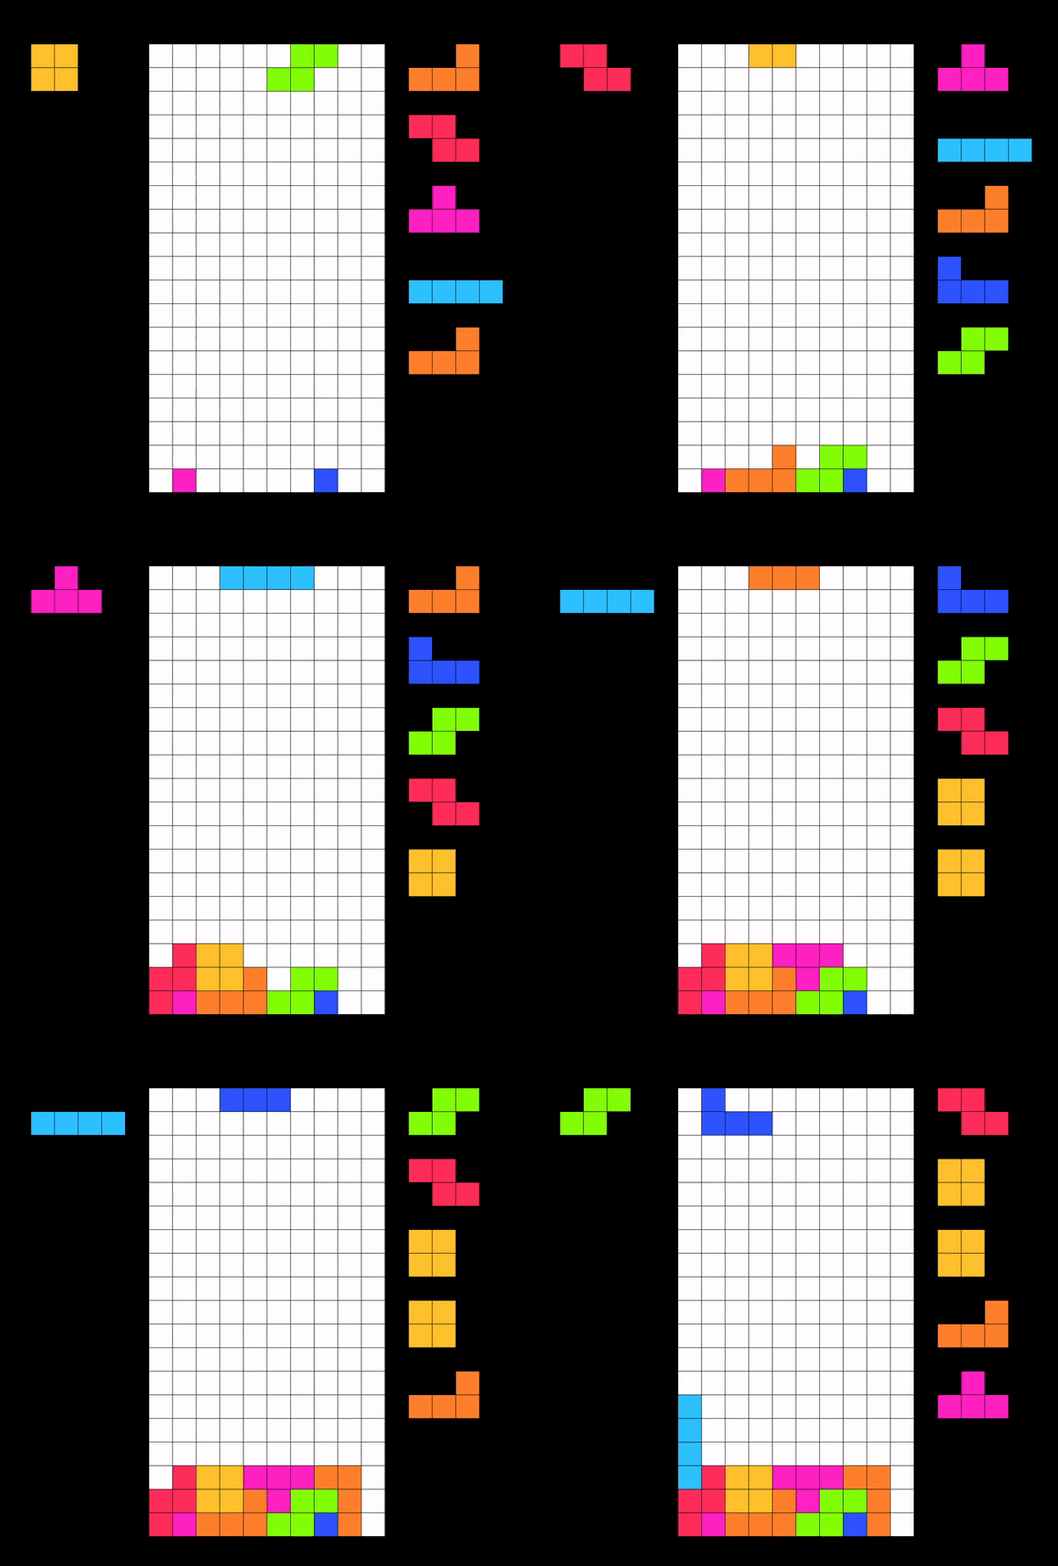
Most modern Tetris games offer preview windows, which show the tetrominos that are coming next in the queue, although the number of previewed pieces varies depending on the game. In our game, we'll be using five preview windows, similar to Tetr.io and Jstris.
The base for our preview window is a 4x15 grid, similar to the playing board, but colored black.
Grid queue = Grid(4, 15, 850, 50, Color::Black);
We'll write a function to update the queue every time a piece is used (shown below). queue_fmt() is a utility function which adjusts the spawning offset of a given piece, allowing us to override the default spawn offsets and draw the pieces along the left edge of the grid. We make a copy of the tetromino as to not change it (by reference) before it is spawned on the board.
void GameManager::updateQueue()
{
    queue.wipeBoard();
    for (int i = 0; i < 5; i++)
    {
        Tetromino cpy = mino_q[i];
        cpy.queue_fmt(i + 2 * i + 1); //+1 accounts for top row not being drawn
        cpy.drawMino(queue);
    }
}
Running the our code yields the following.
2.9 Holding
One of the most essential mechanics of Tetris is holding, where the current tetromino is traded for a "held" piece, allowing the player to save a the mino until they need it.
Similar to the preview display, we'll use an instance of the Grid class, located on the left hand side of the screen, to make the window for held pieces.
Grid hold_preview = Grid(4, 3, 50, 50, Color::Black);
Now let's write the hold() function. This should be relatively intuitive, but the challenge lies in figuring out what to do with the first hold (where there is no held piece to swap the current with). In this implementation, I initialized the held tetromino as a placeholder with a whitespace character as its code. Within the hold function, we check for the whitespace character in the held piece, and if it is present, we know that we should spawn a new piece instead of swapping.
We also need to remember to reset the rotation and position of the tetromino being held so that the piece spawns correctly when released.
void GameManager::hold()
{
    Tetromino tmp = held;
    curr.wipeMino(grid);
    curr.reset();
    if (held.code == ' ')
    {
        held = curr;
        spawn();
    }
    else
    {
        held = curr;
        curr = tmp;
        curr.drawMino(grid);/
    }

    hold_preview.wipeBoard();
    Tetromino cpy = held;
    cpy.queue_fmt(1); //+1 accounts for top row not being drawn
    cpy.drawMino(hold_preview);
}
A quick playtest verifies that the hold function is working correctly.
2.10 Game Over
The game of Tetris ends when the player "tops out" - when the next piece has no room left at the top to spawn. Including the following code block within our spawn() function should be adequate.
mino_q.erase(mino_q.begin());
...
if (!curr.validFit(grid))
{
    gameOver = true;
    return;
}
...
curr.drawMino(grid);
I'm satisfied with the game simply closing after the player tops out, so I'll include the following condition in the main while loop.
while (window.isOpen() and !gm.gameOver)
The window will now automatically close whenever the player loses the game.
3.1 Final thoughts
That's it for now! We've created a fully functional Tetris game, complete with core mechanics and visuals. In addition, we've been able to gain a better understanding of SFML, object oriented programming, multithreading, and everything in between.
There are definitely a few parts of the project that I'd like to improve. Unfortunately, the SRS rotation system that I originally wanted to implement wasn't working in the final build of the project. More visual aids for the player are also in order; namely, ghost pieces, a line counter, and a settings menu.
4.1 Resources
Will be up on Github soon!